Implementing a Robot Development Lifecycle with Control Room and GitHub
With Control Room and our GitHub integration, you can configure a complete robot development lifecycle following good practice principles related to segregation of duties and change management. Implementing these types of general controls are important not only for compliance, but they help reduce the risk of unexpected failures or unauthorized changes to production robots.
Architecture Overview
The overall architecture of your Control Room will look like this:
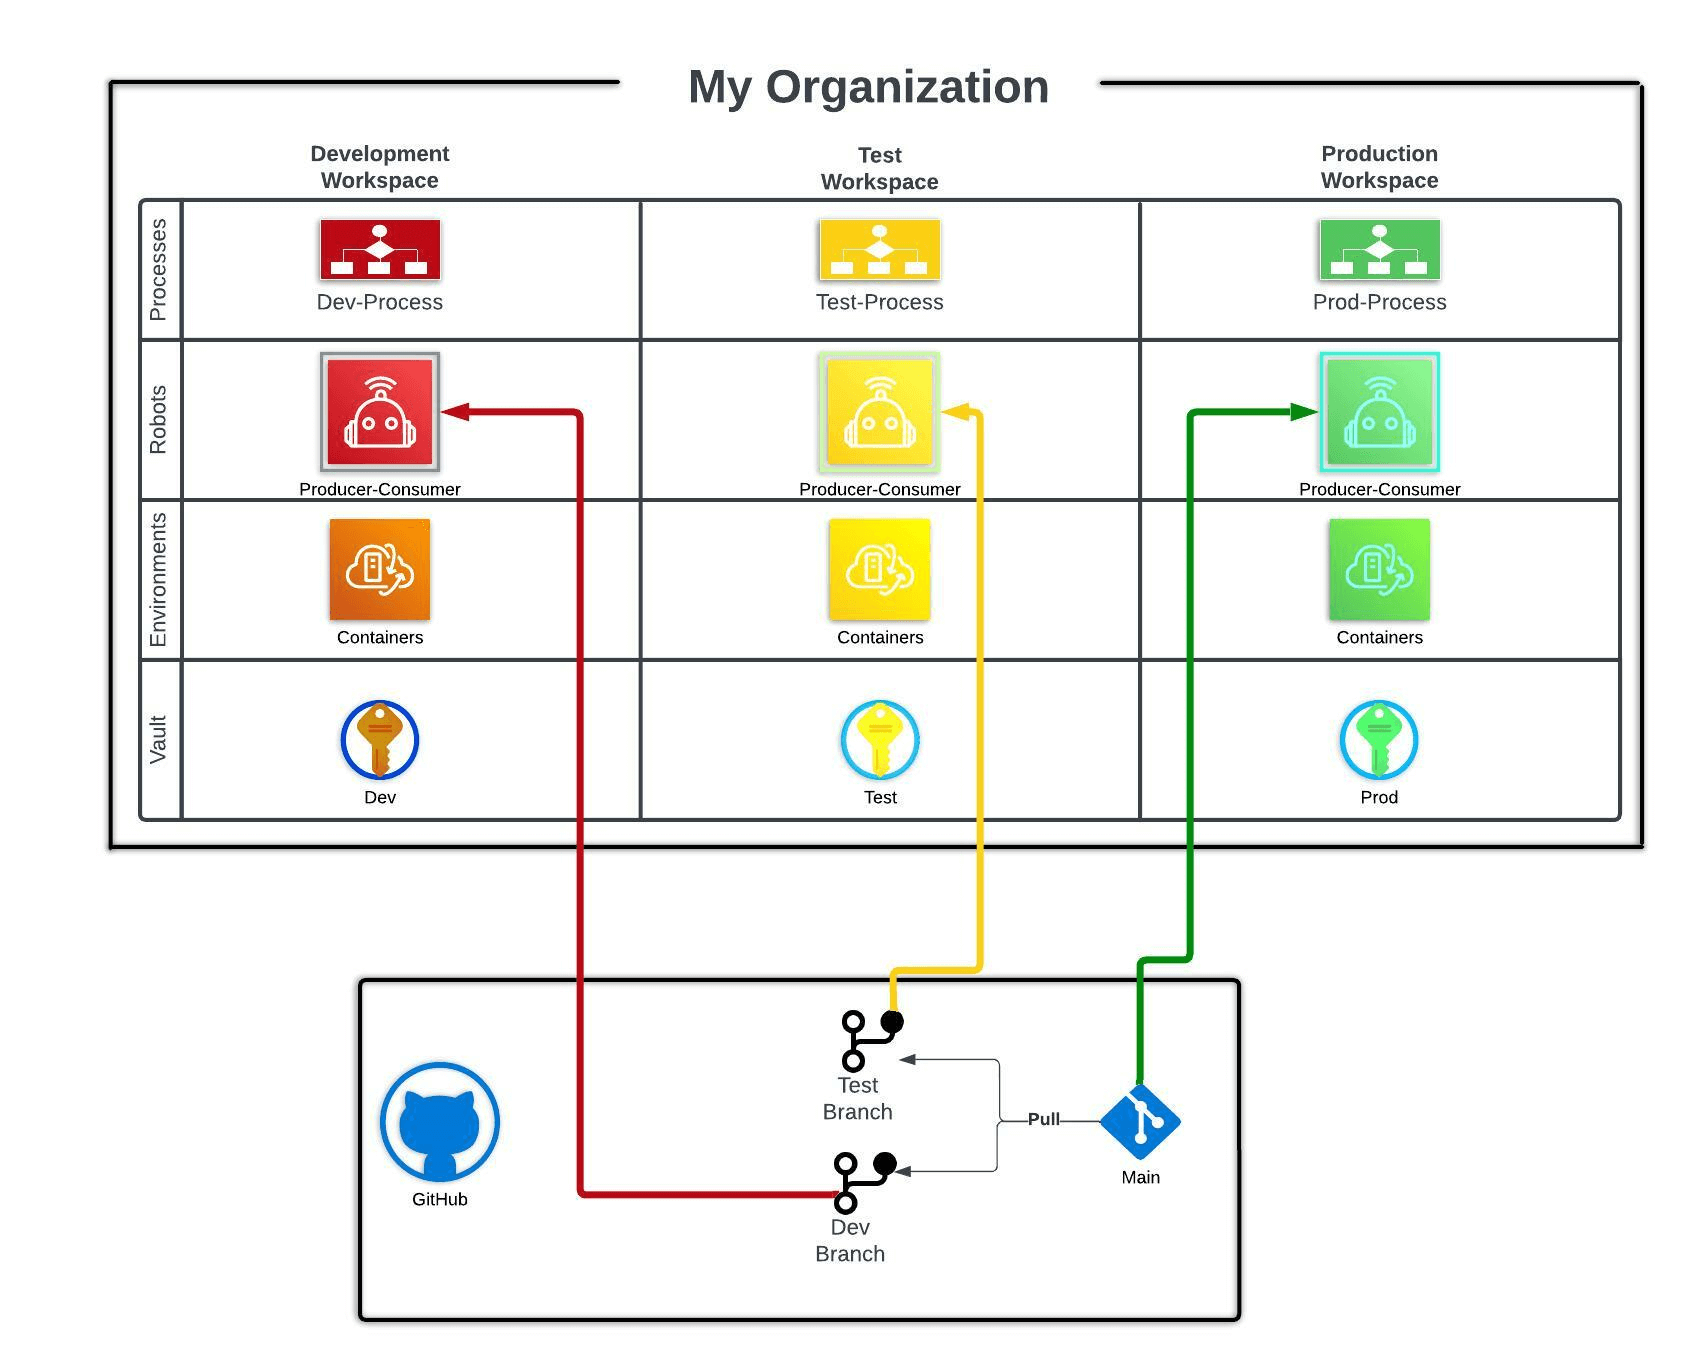
The goal is to create three distinct workspaces to segregate development, testing, and production robot code. Other arrangements are possible, including creating multiple organizations (depending on your product tier) each with their own set of workspaces, creating many groups of workspaces, or creating more than three different segregated workspaces. For the sake of this tutorial, we will assume you are creating only three segregated workspaces within one single organization.
Tutorial: Configuring the Robot Development Lifecycle
Prerequisites
- A Control Room Organization
- You must be at least an administrator in this organization to make the required changes.
- You must be on a Flex plan or higher to setup more than one workspace.
- A GitHub repository
- You must have admin permissions in this repository to make the required changes.
Creating the Workspaces in Control Room
You will need at least three different workspaces in your control room, one each for production, test, and development. If you have completed our certification course, you will be familiar with RobotSpareBin Industries and it’s one workspace Production. In order to expand these and give RobotSpareBin Industries a complete set of workspaces to support their new Robot Development Lifecycle, we will add a Test and Development workspace.
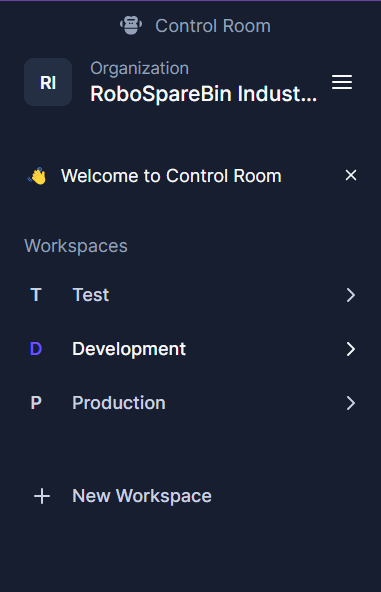
Create a new workspace in your organization.
Name the first Test and the second Development. You will have three total workspaces.
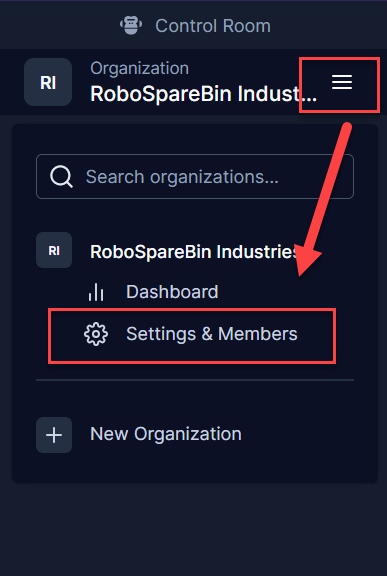
You should invite the appropriate team members to each workspace. In this example, we will invite a developer, a tester, and a DevOps administrator. Start by navigating to Settings & Members under you organization’s navigation menu.
From there, you can invite users to the organization via the add button. Each user will be a member of the organization.
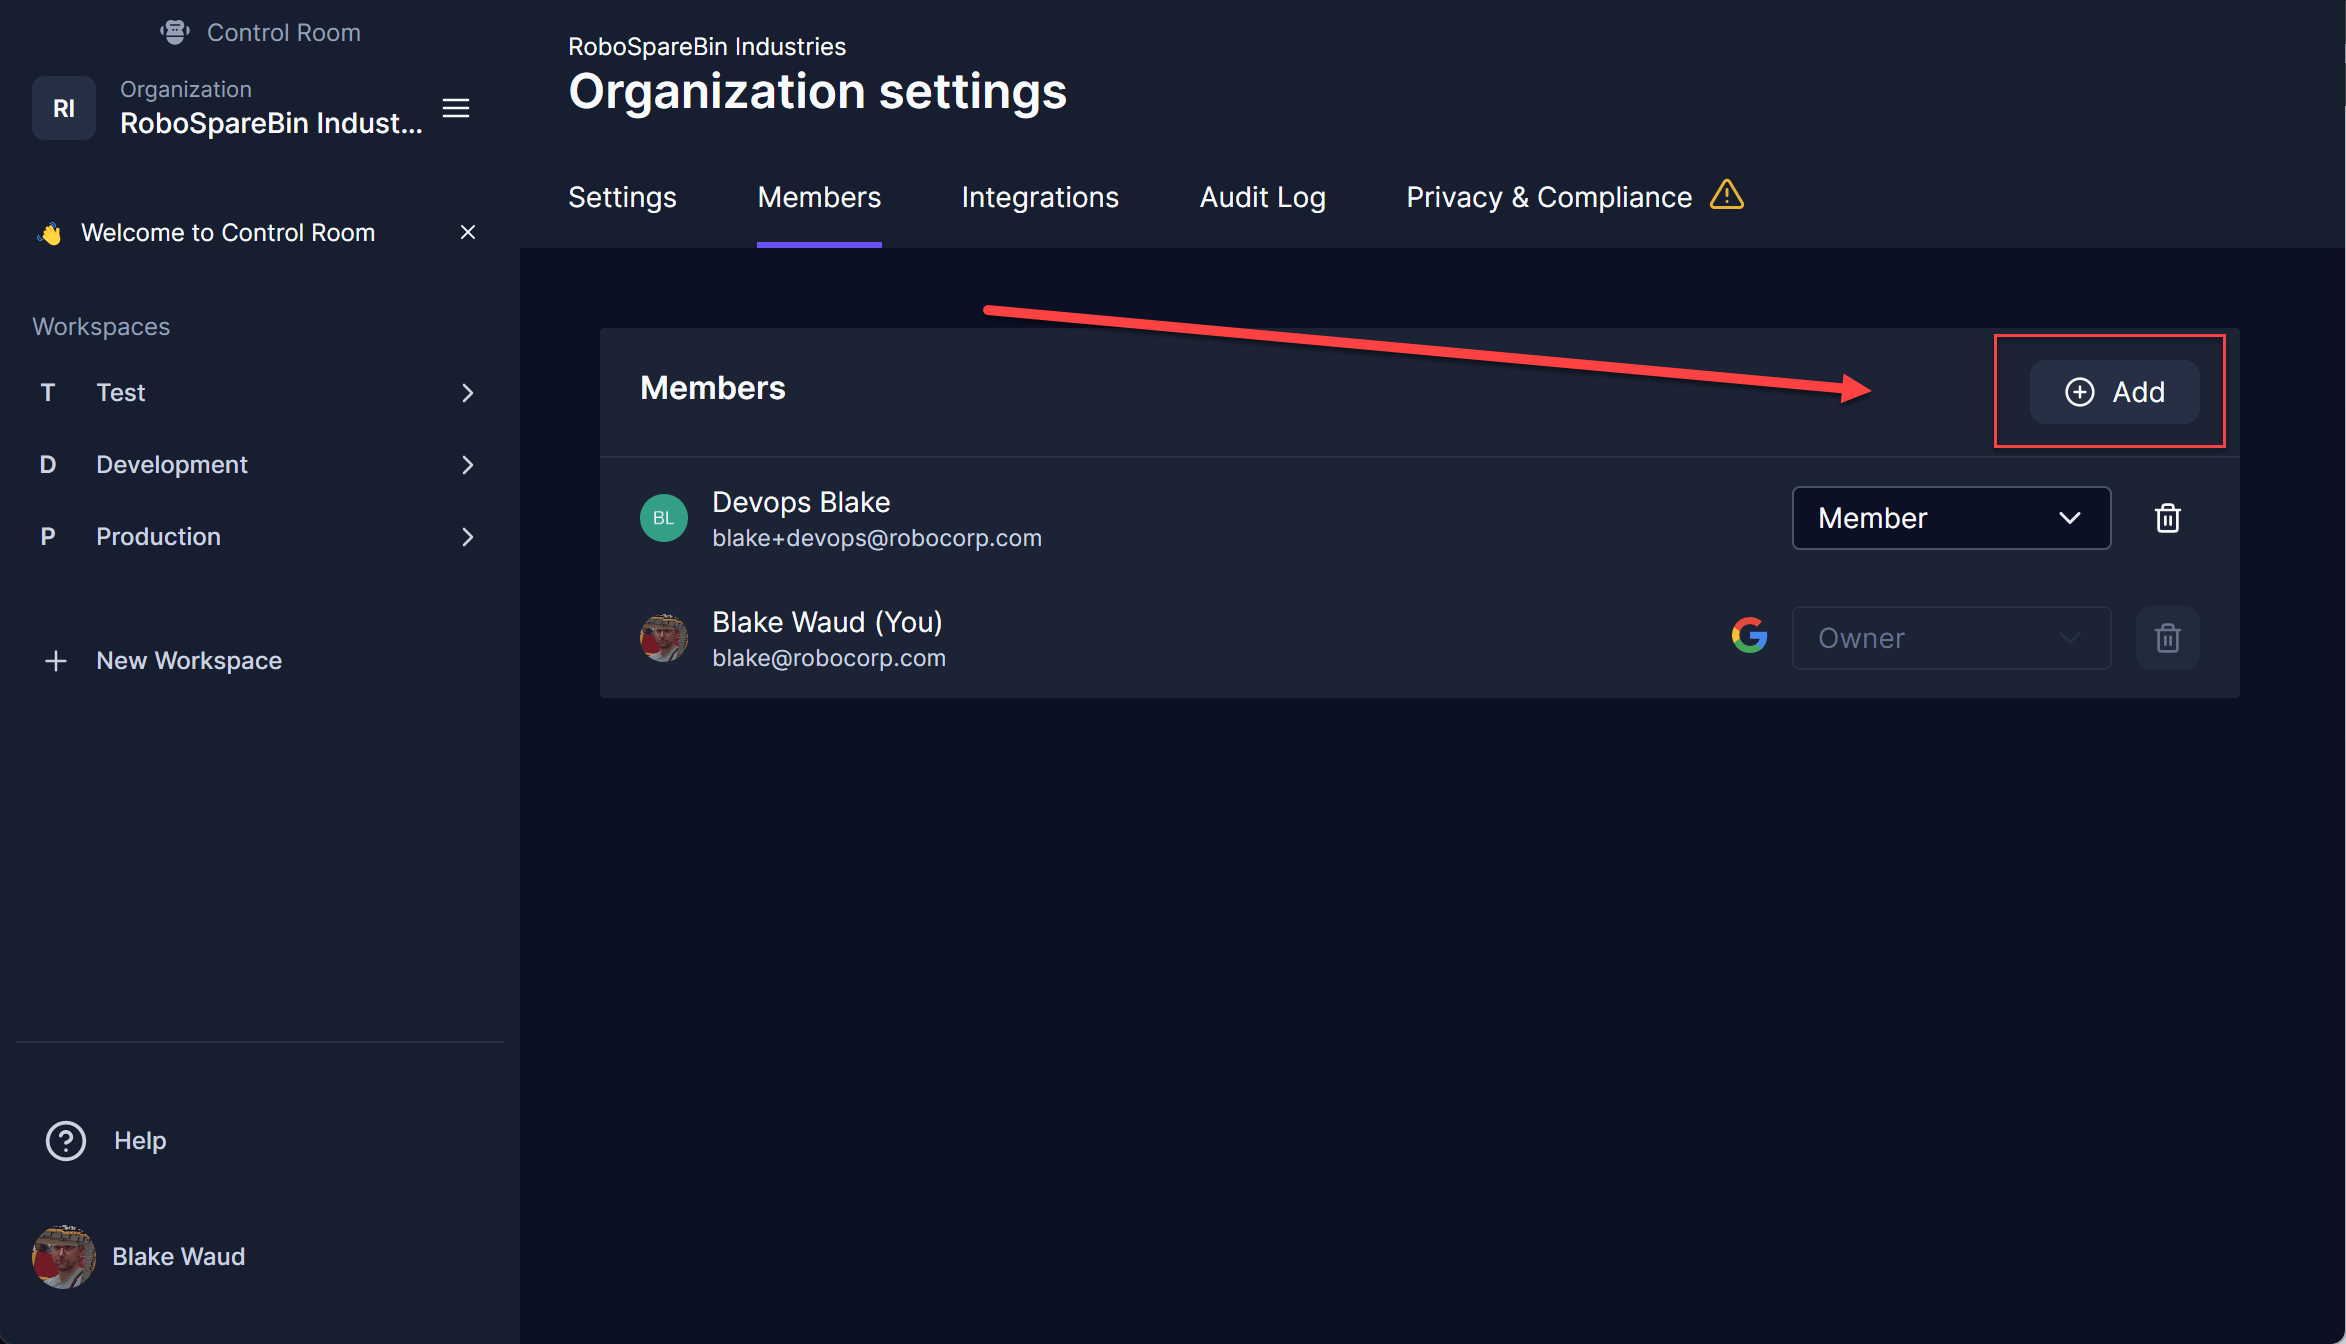
Now invite the appropriate members to each respective workspace, devops users would work in Production, test users would work in Test, and developers would work in Development. Click on the appropriate workspace and then navigate to that workspace’s Settings & Members page. In that page, navigate to Members and then add the appropriate member and share the workspace.
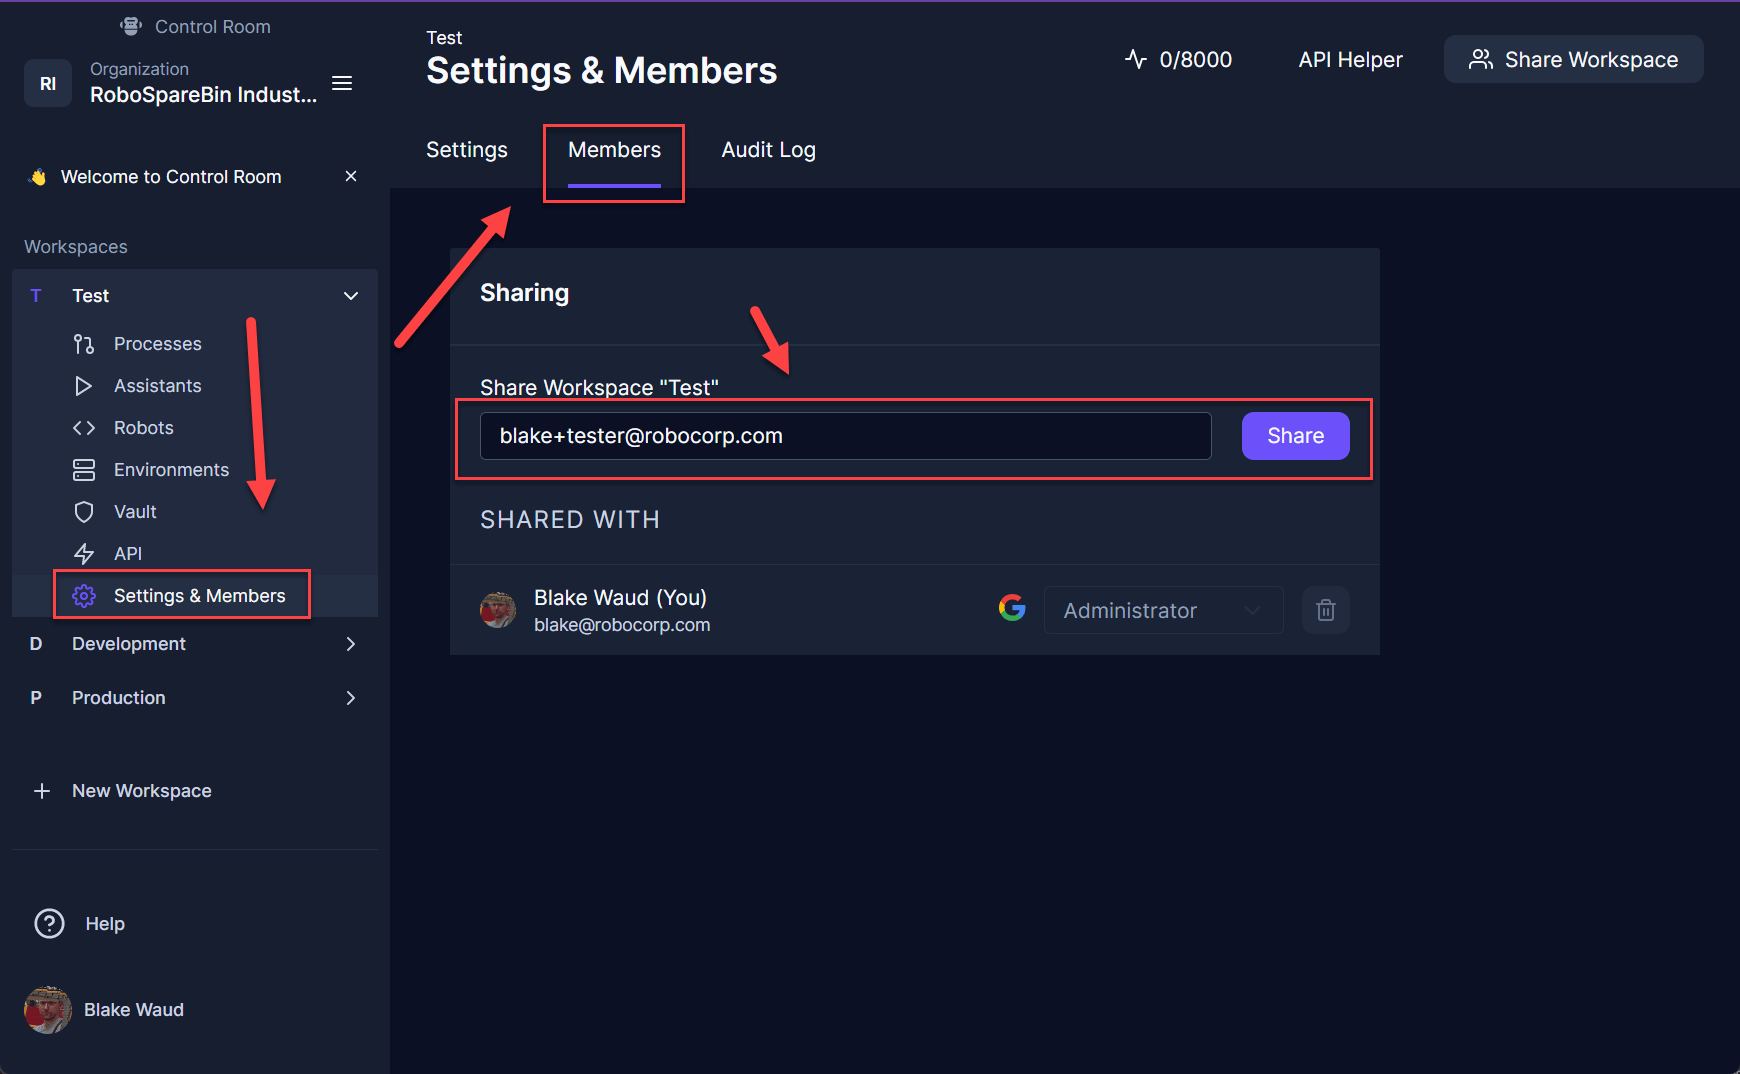
The users should be given at least Developer access so they are able to add and edit robots.
Creating a Repository in GitHub
The other side of this coin is the robot repository in GitHub. By creating a repository with protected branches, you will be able to enforce control activities before changes are released.
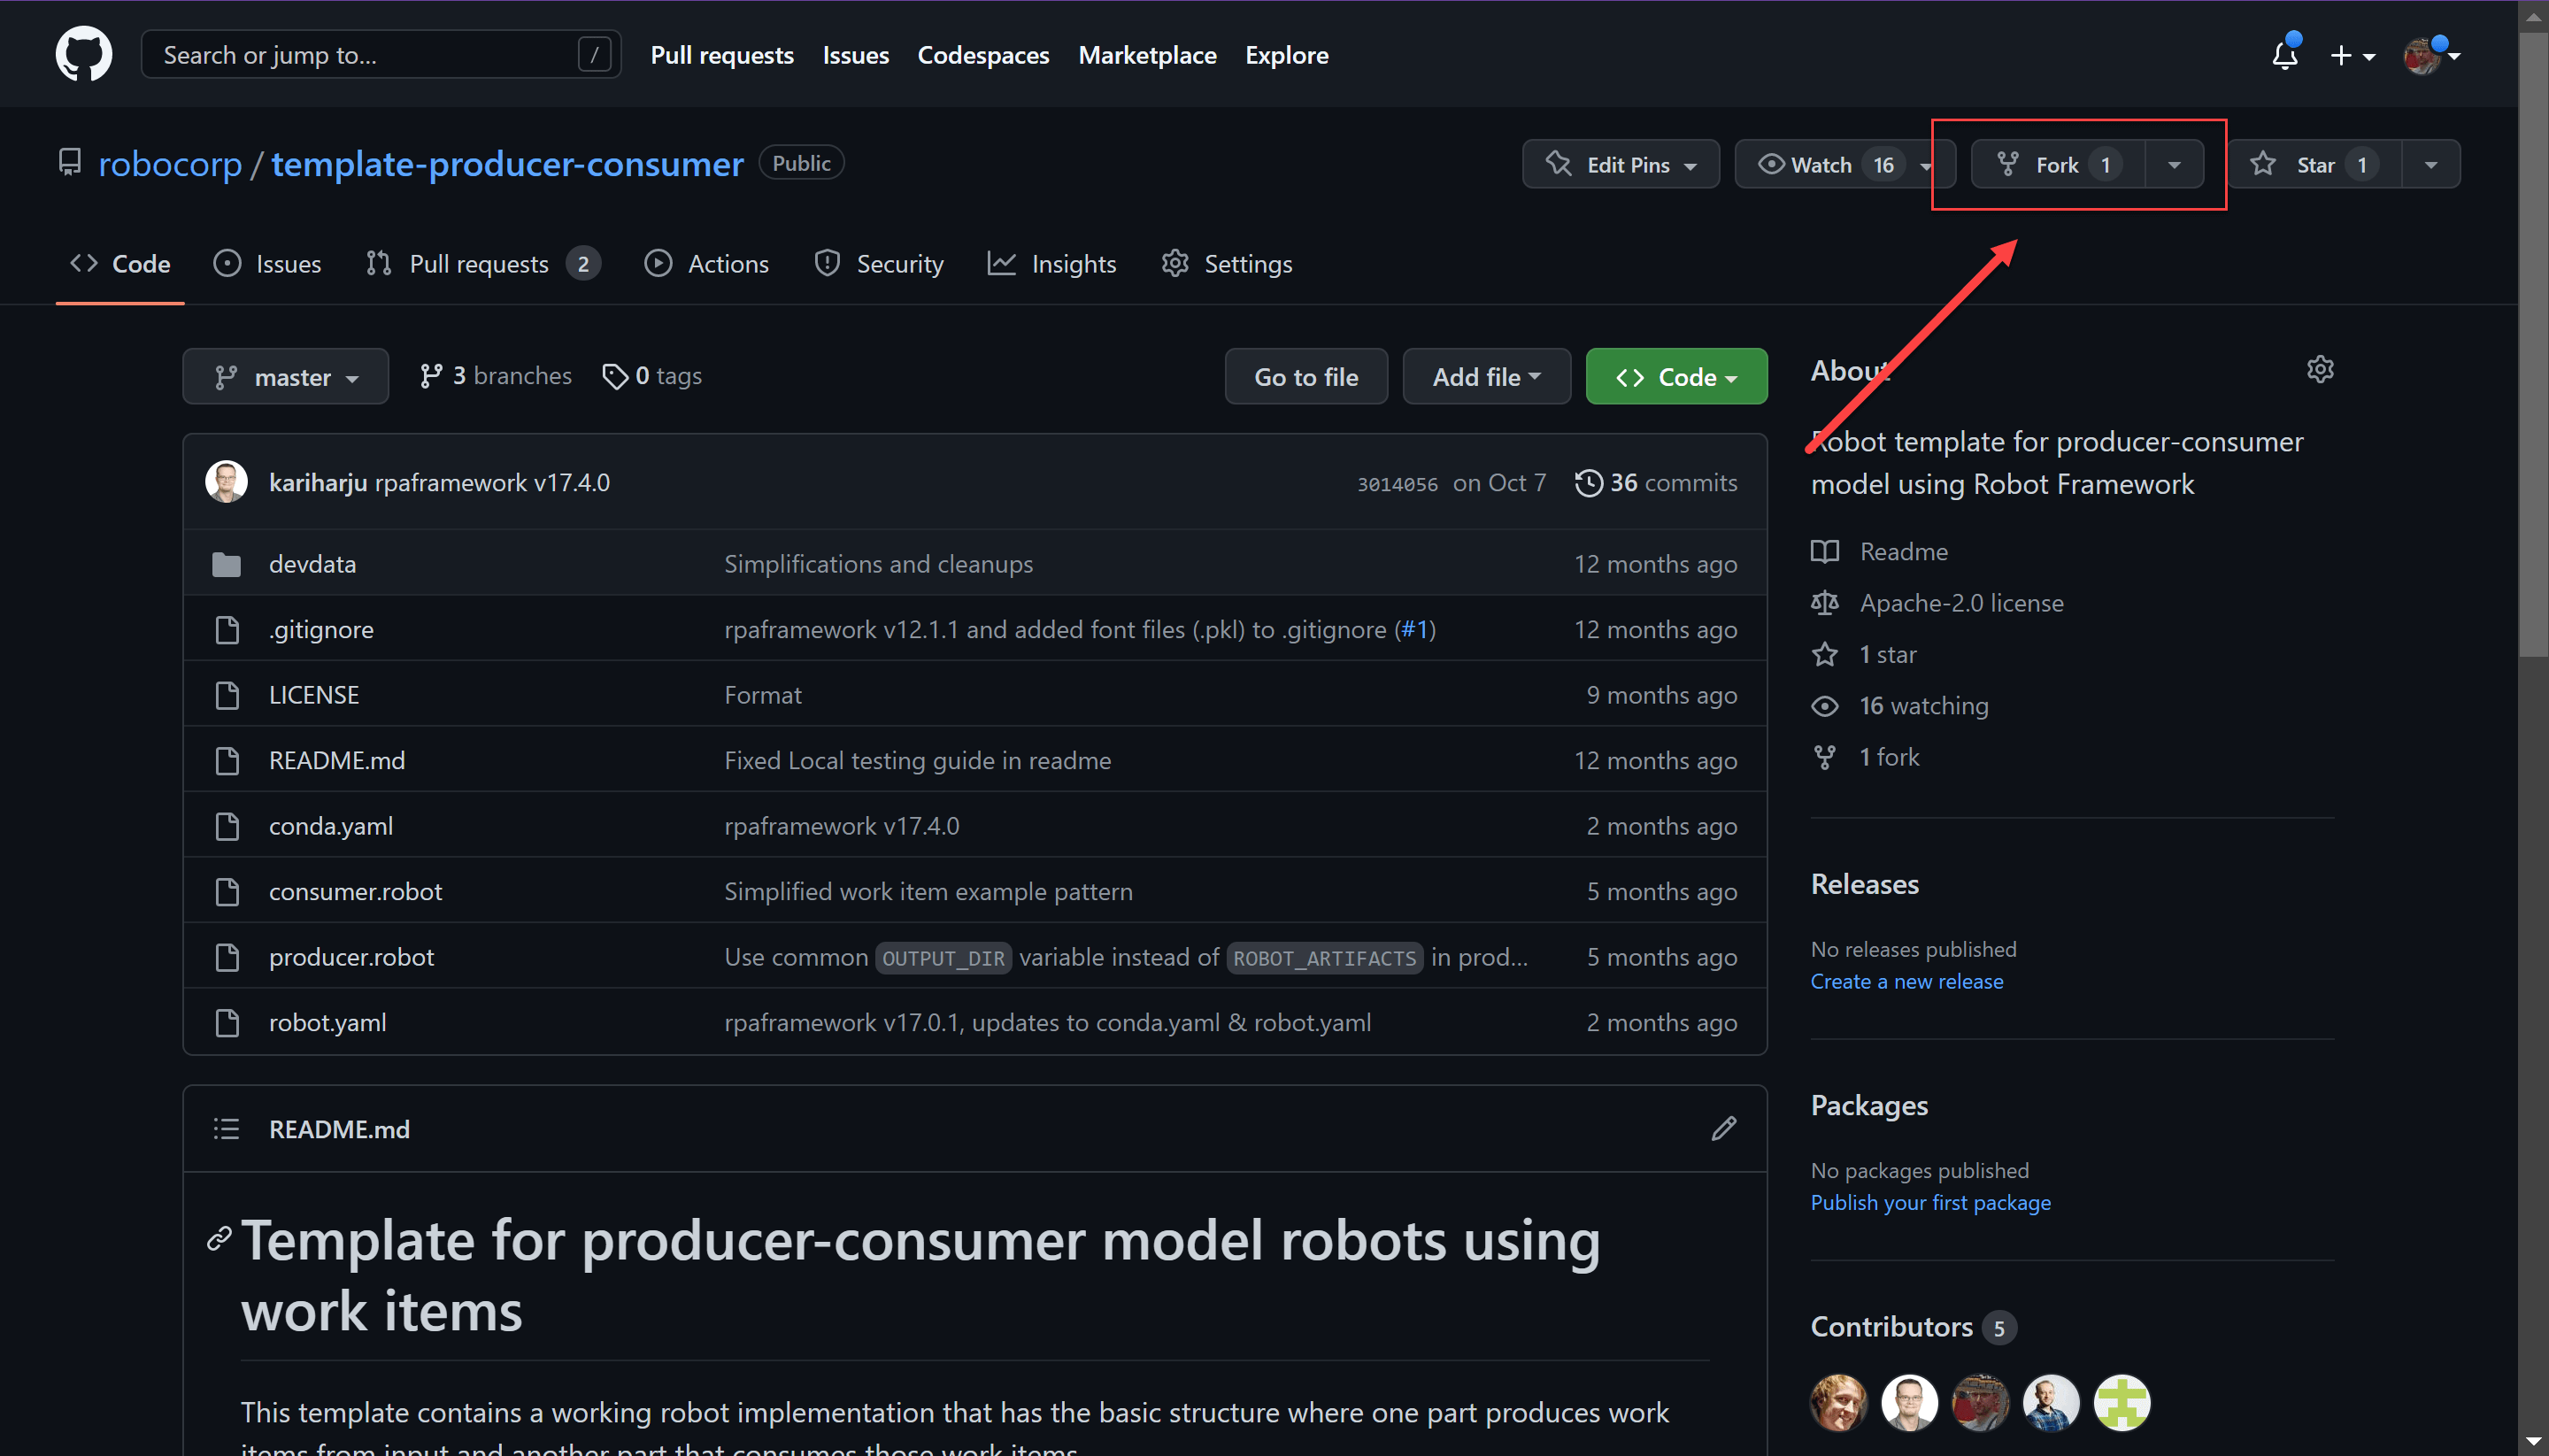
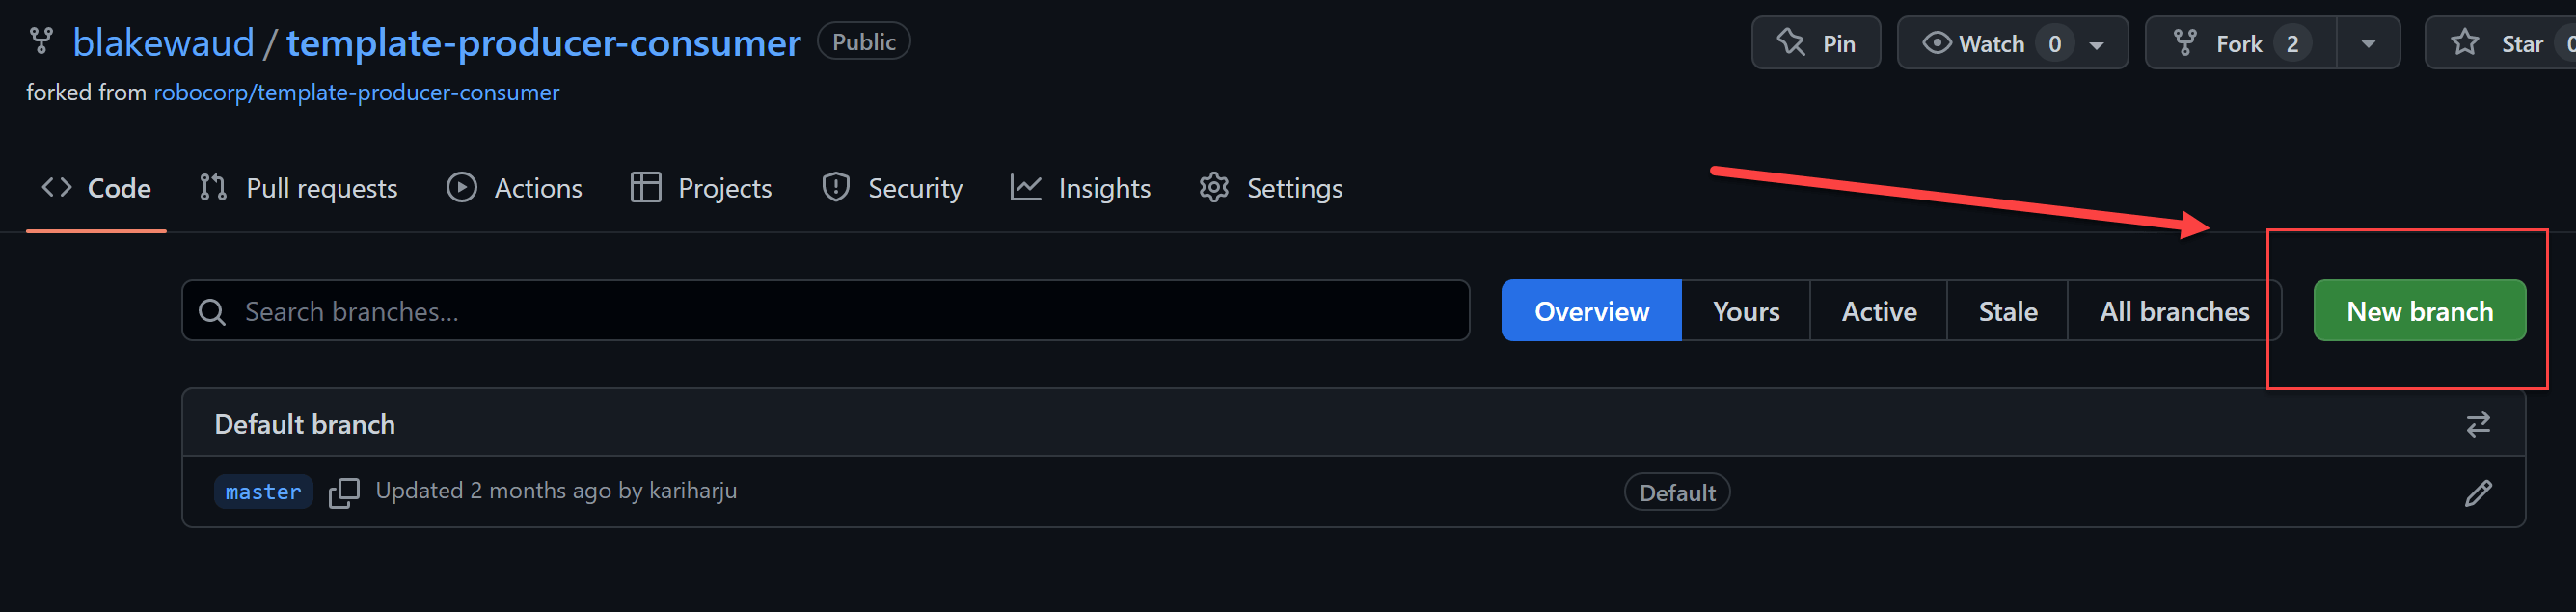
Create a new public repository. This can be done with a free GitHub account and offers you the ability to configure protection, which is needed to complete this tutorial. Once you have your account, create a repository by forking our producer-consumer template.
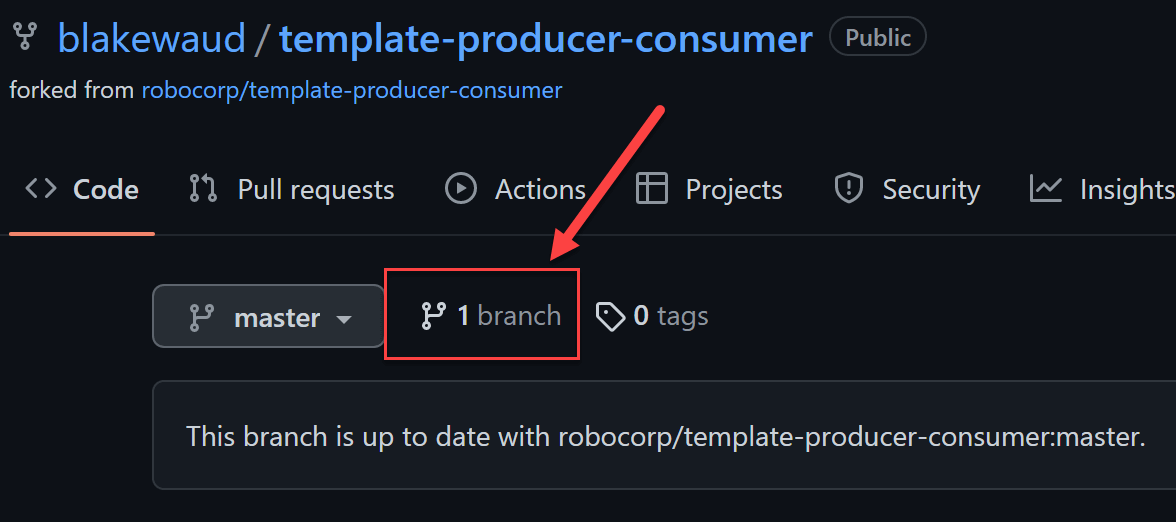
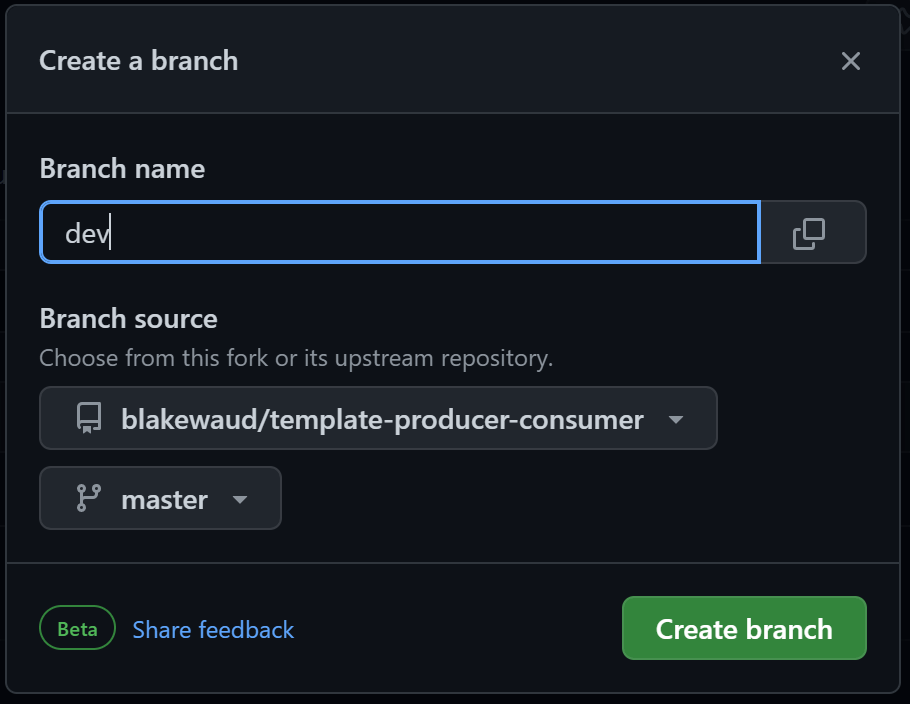
Once forked, create two more branches, dev and test by clicking on the branch button and then New branch button.
Once you have three branches, you can configure protection on those branches. For this tutorial, we will be configuring protection so it is impossible to merge changes into test or master without an approved Pull Request. In dev however, we will allow merges without the need for PRs to be approved. Your specific configurations may be different depending on your compliance requirements, but these settings are generally considered good practice.
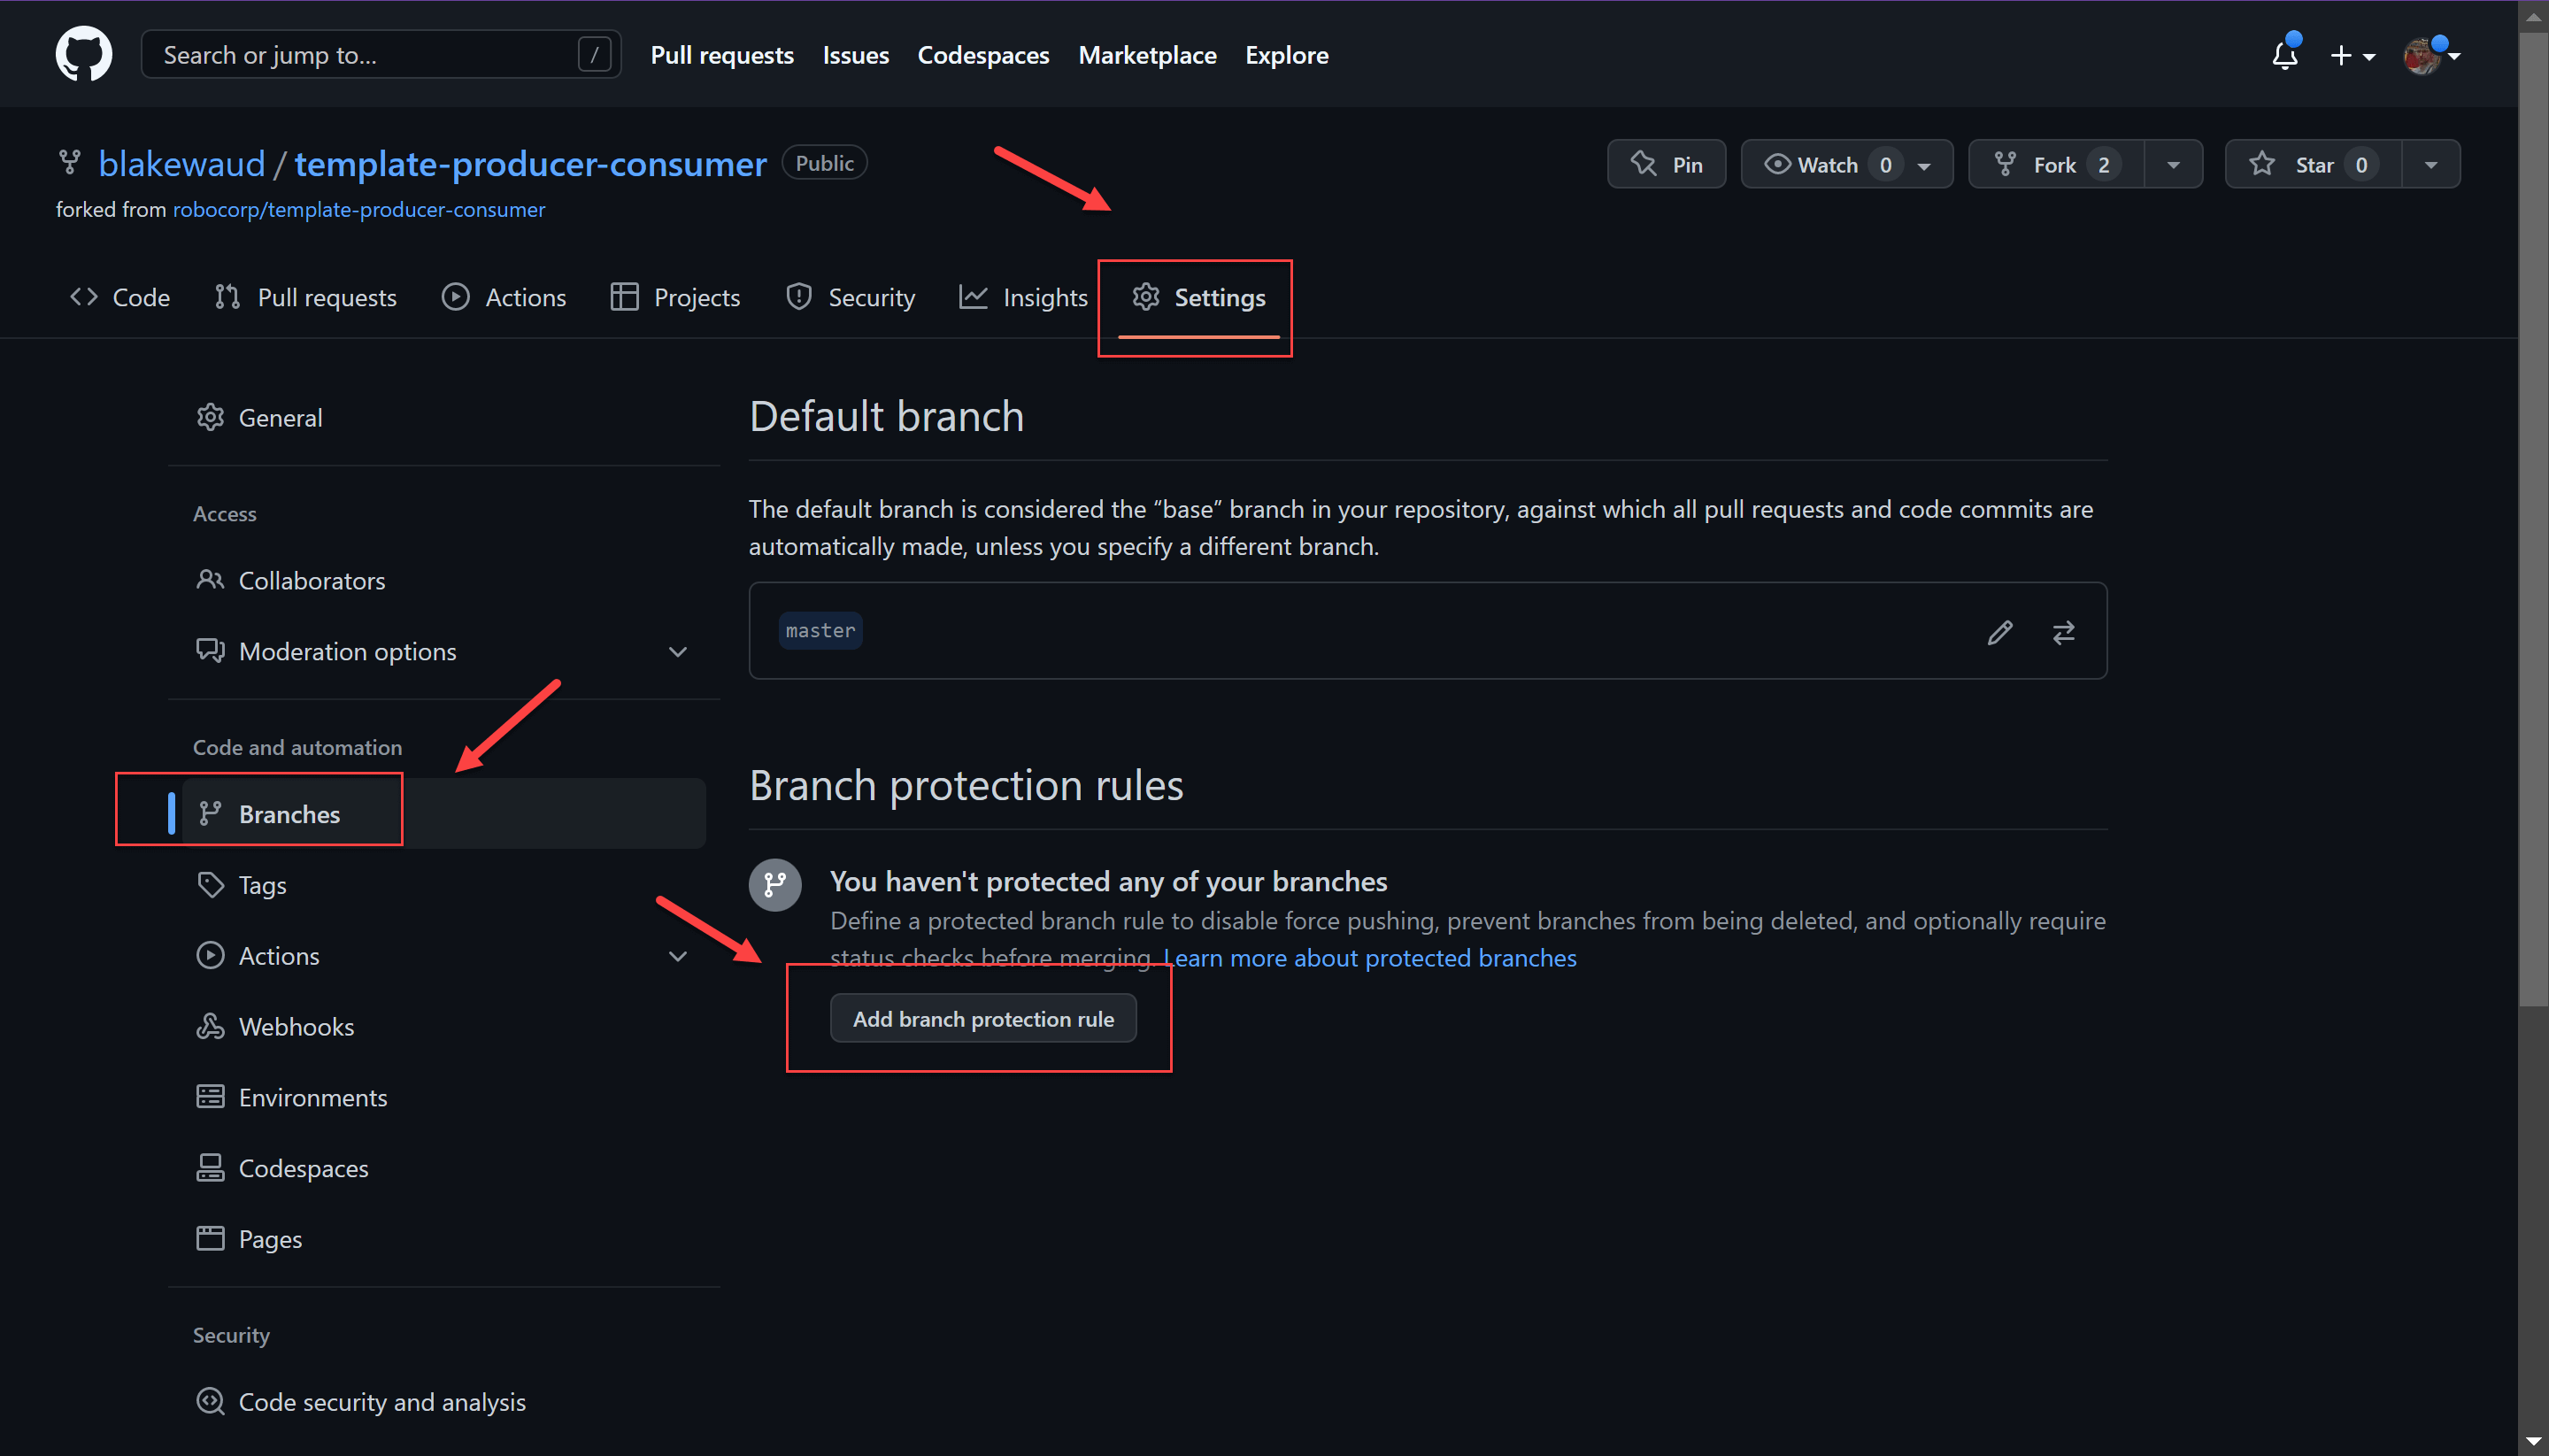
From the repository’s Settings menu, you can configure branch protection under Branches by clicking Add branch protection rule.
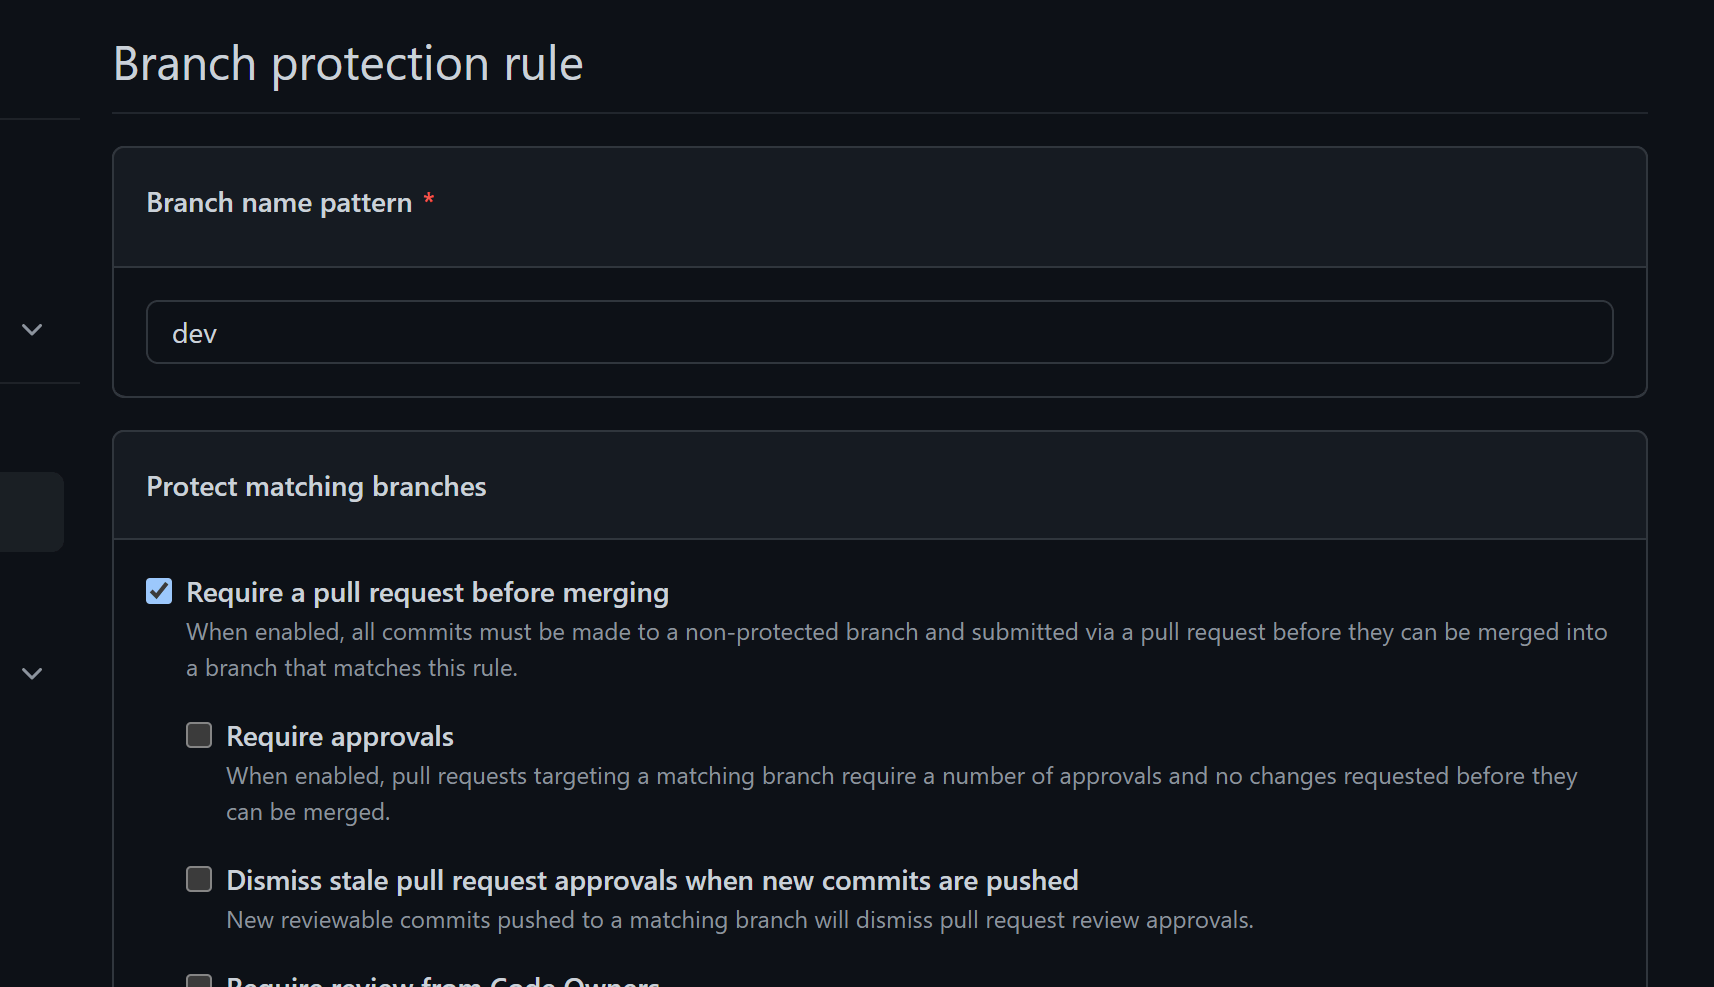
Set the name pattern to master and then turn on the following rules:
Require a pull request before mergingRequire approvalsDismiss stale pull request approvals when new commits are pushedRequire approval of the most recent push
Do not allow bypassing the above settings
Your settings page should look like this before creating the rule.
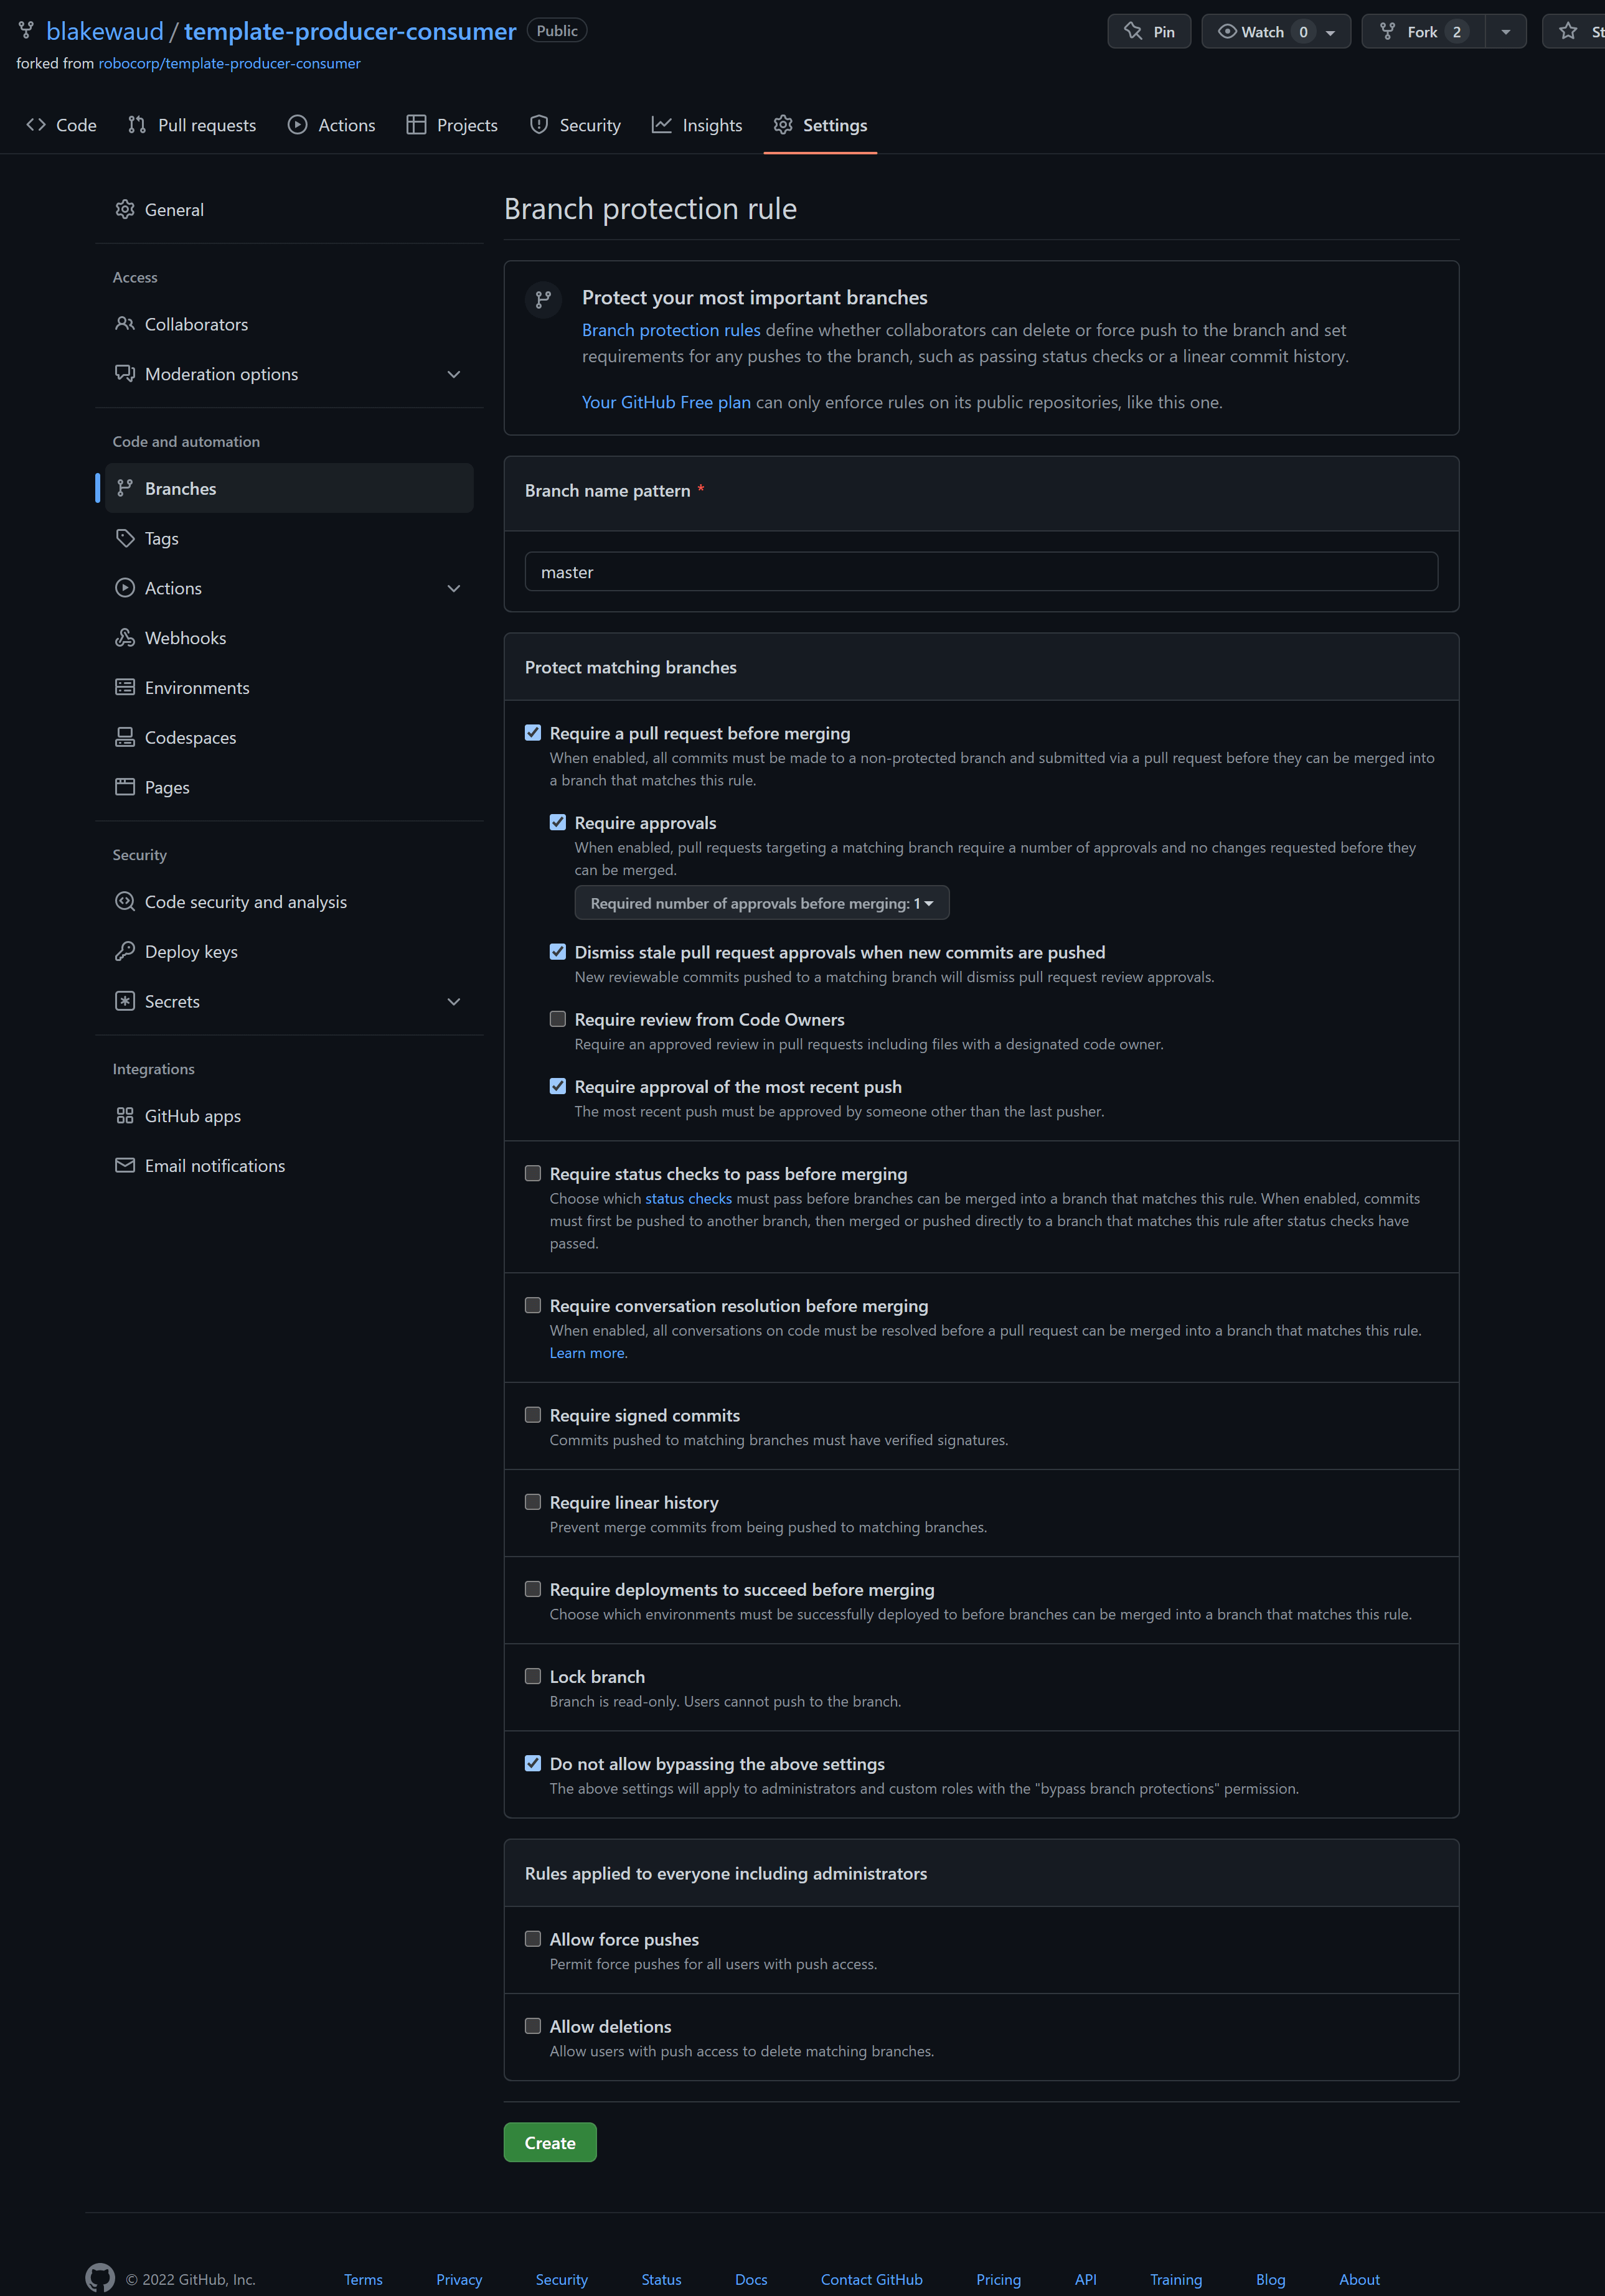
Once the rule is created, create another rule with the same settings except the name patter should be test.
Finally, create a rule for dev but only set Require a pull request before merging and unset Require approvals.
When setting this up for your own repositories, if you utilize automatic checks with GitHub action workflows, you can also set Require status checks to pass before merging which will ensure your CI/CD processes will pass before any change is deployed to protected workspaces.
Bringing it all together
Now you are ready to integrate your Control Room workspaces with your new GitHub repository!
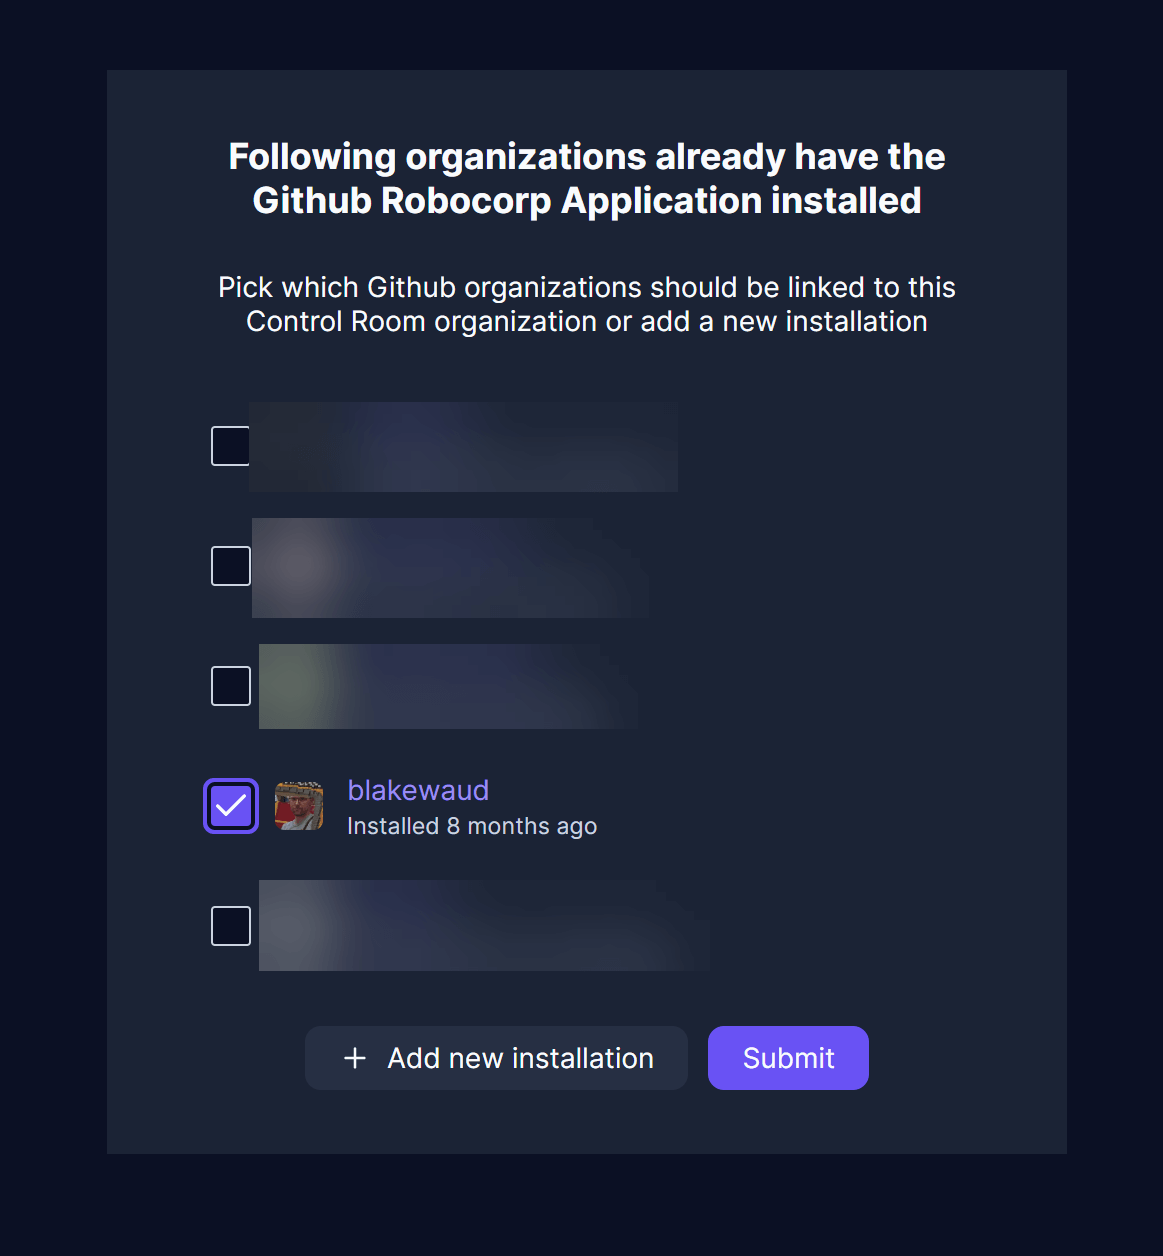
To do so, first turn on the integration from your Organization settings under the Integrations tab. Click the Connect GitHub button and complete the authentication, choosing your personal account to install the Robocorp App.

You may have to install the app first if you have not done so.
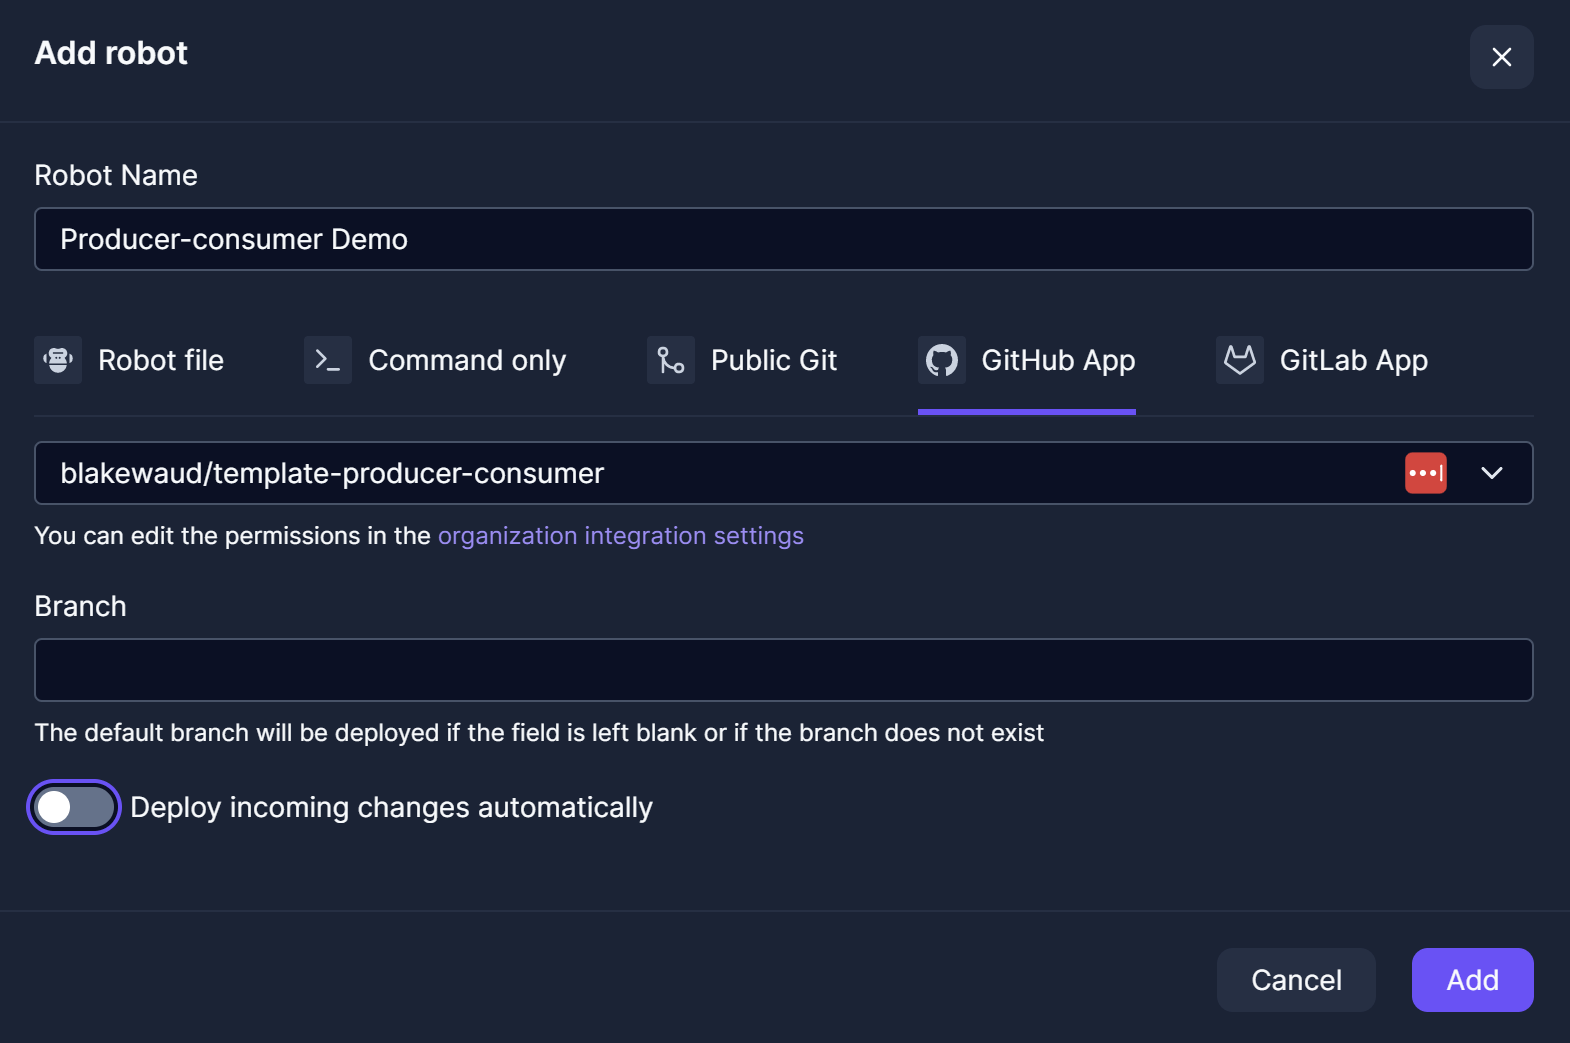
Once connected, you can create a new robot in Control Room which will house the code from the GitHub repo we created earlier. Let’s start with the Development workspace. Navigate to the Robots page and create a New Robot. Name the robot Producer-consumer Demo. Chose the GitHub App integration from the new robot wizard. Find the repo you created earlier in your GitHub account and select it.
Take note, you are able to type into the box to find your repository!
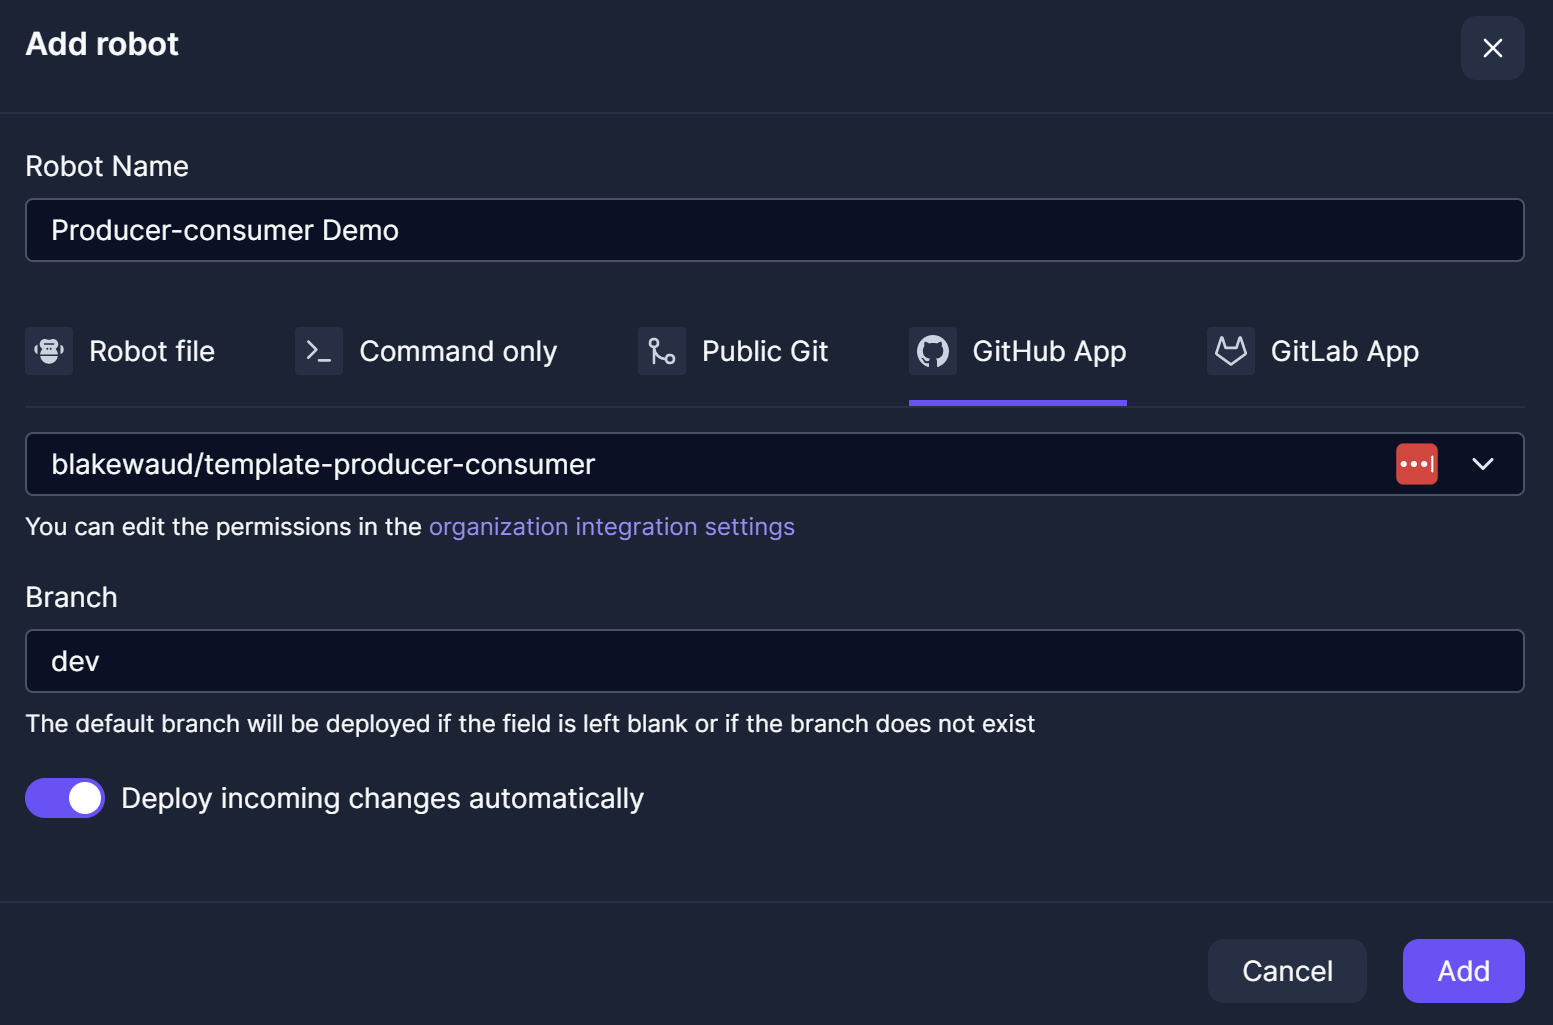
Next add the robot to the Test workspace with the same name, but change the branch it is tracking to test, this is the part of configuration which allows you to permanently connect protected branches from GitHub to specific robots in Control Room.
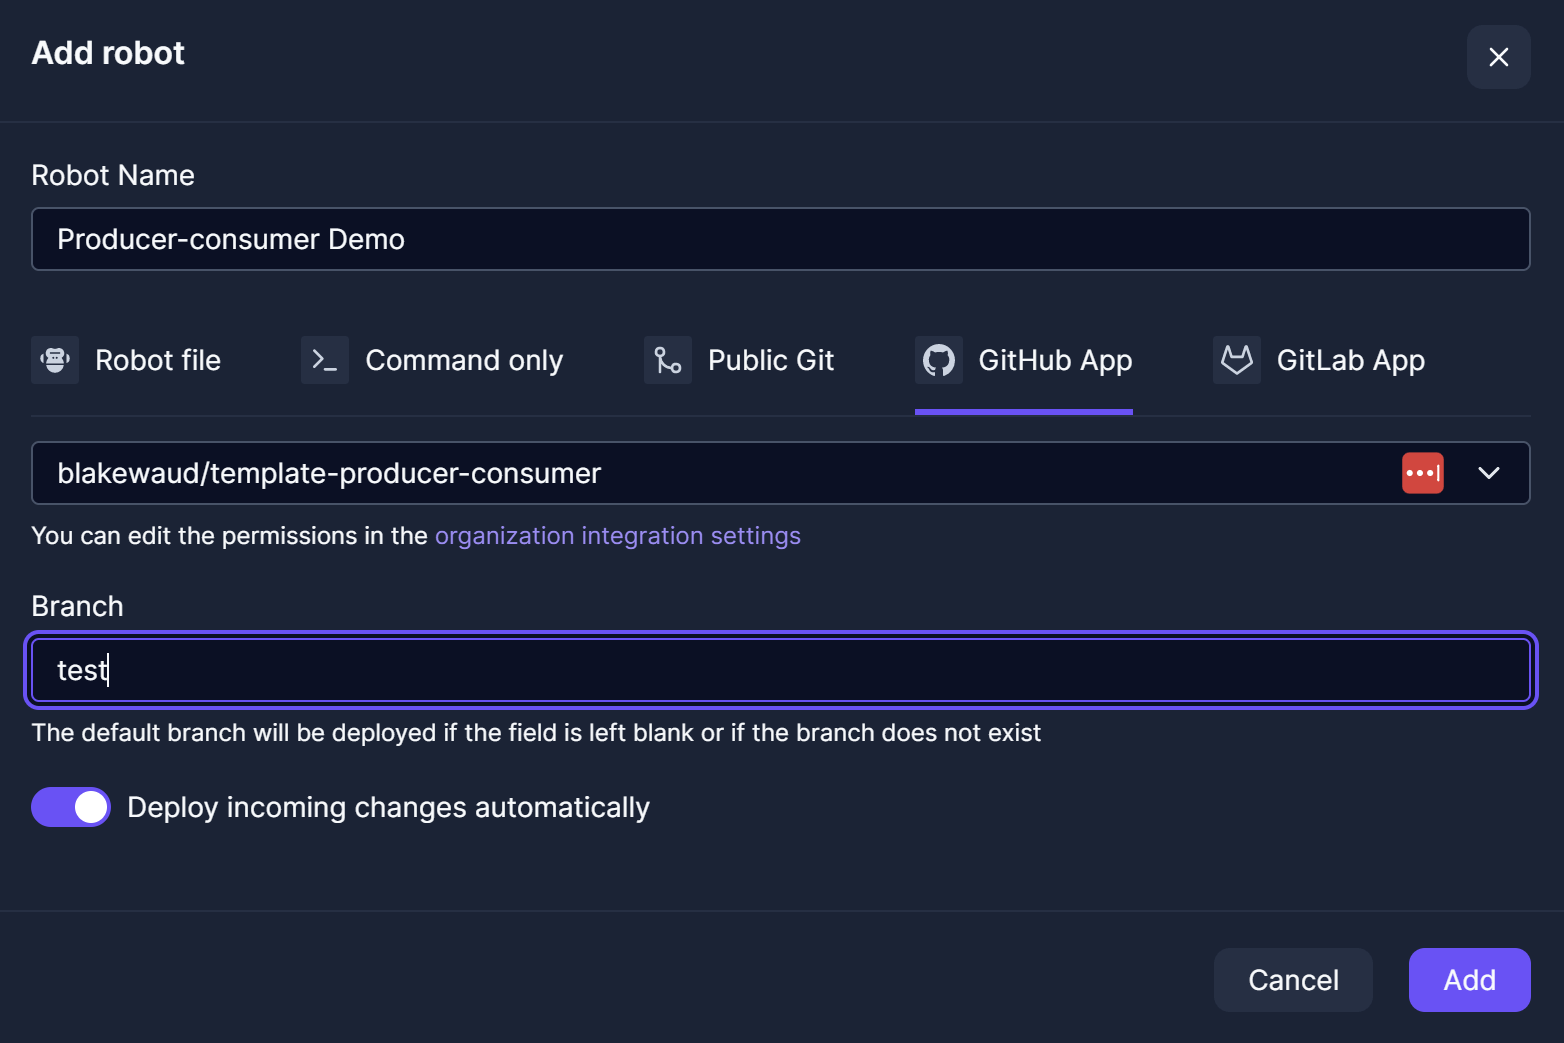
Finally, add the robot to Production but do not set a branch (or set master if you want to be explicit).
Be sure to unset
Deploy incoming changes automaticallyto the production robot so that changes only happen when the operations team is ready to support the change!
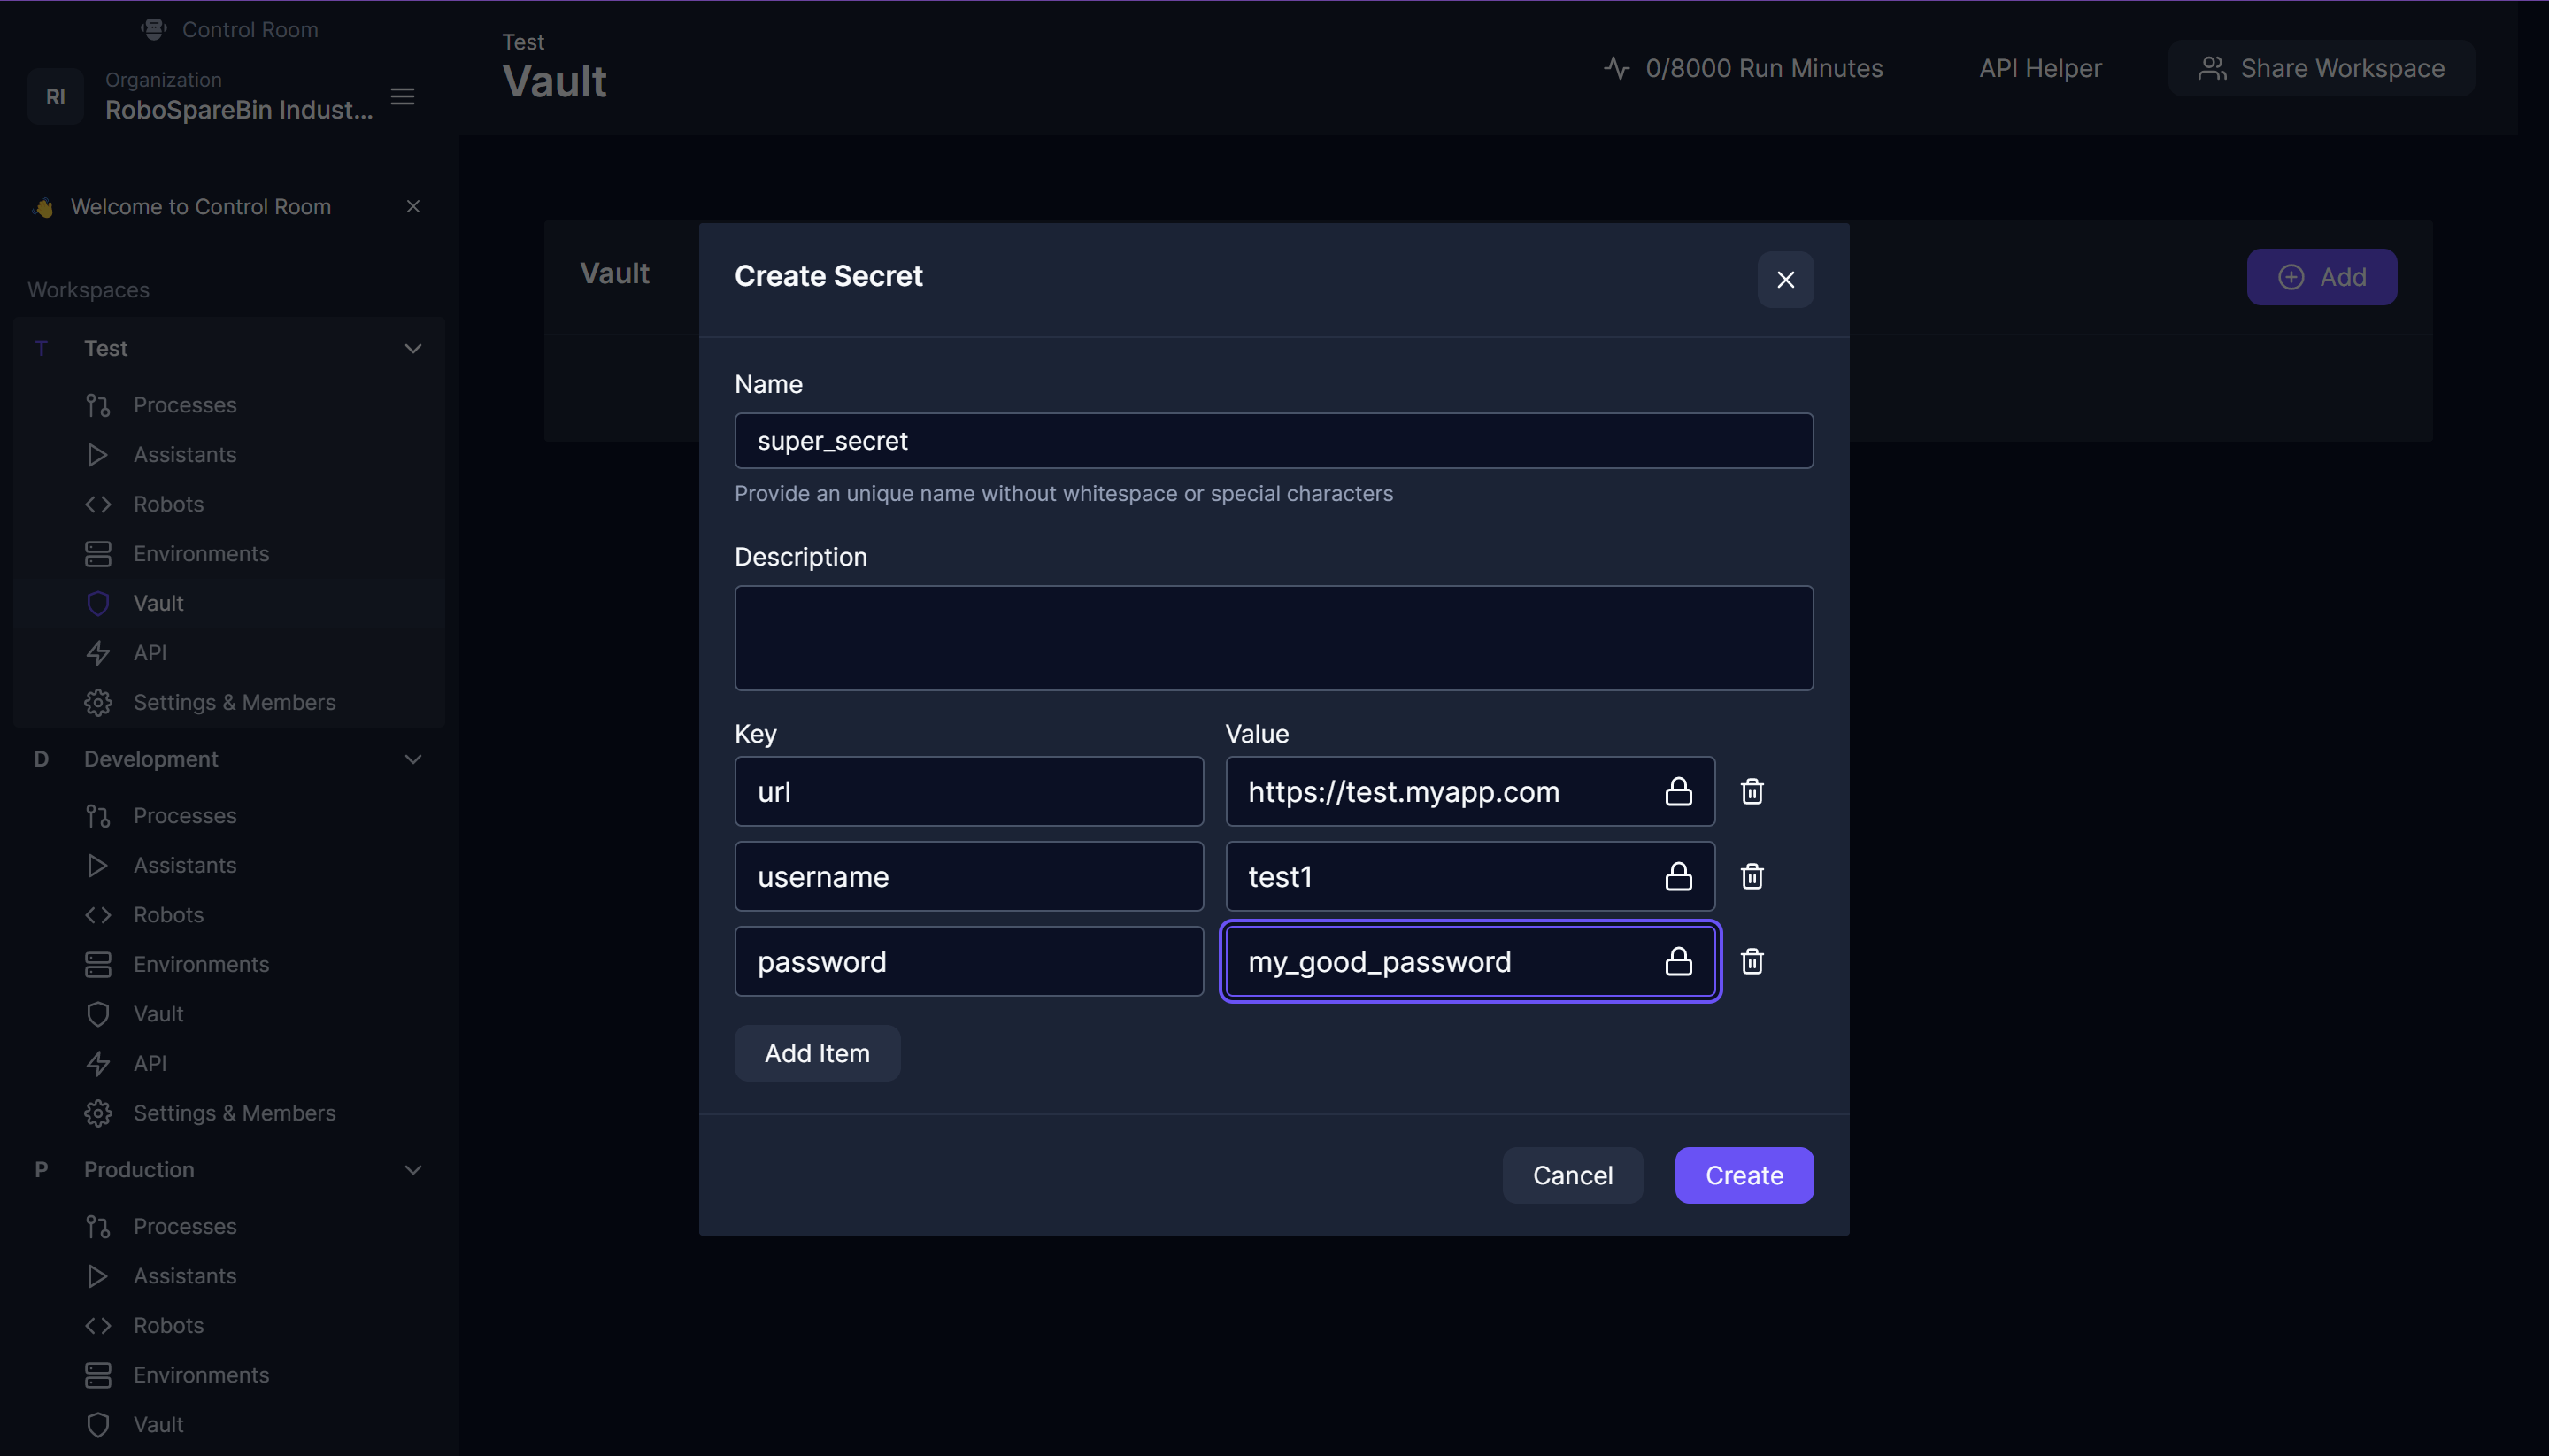
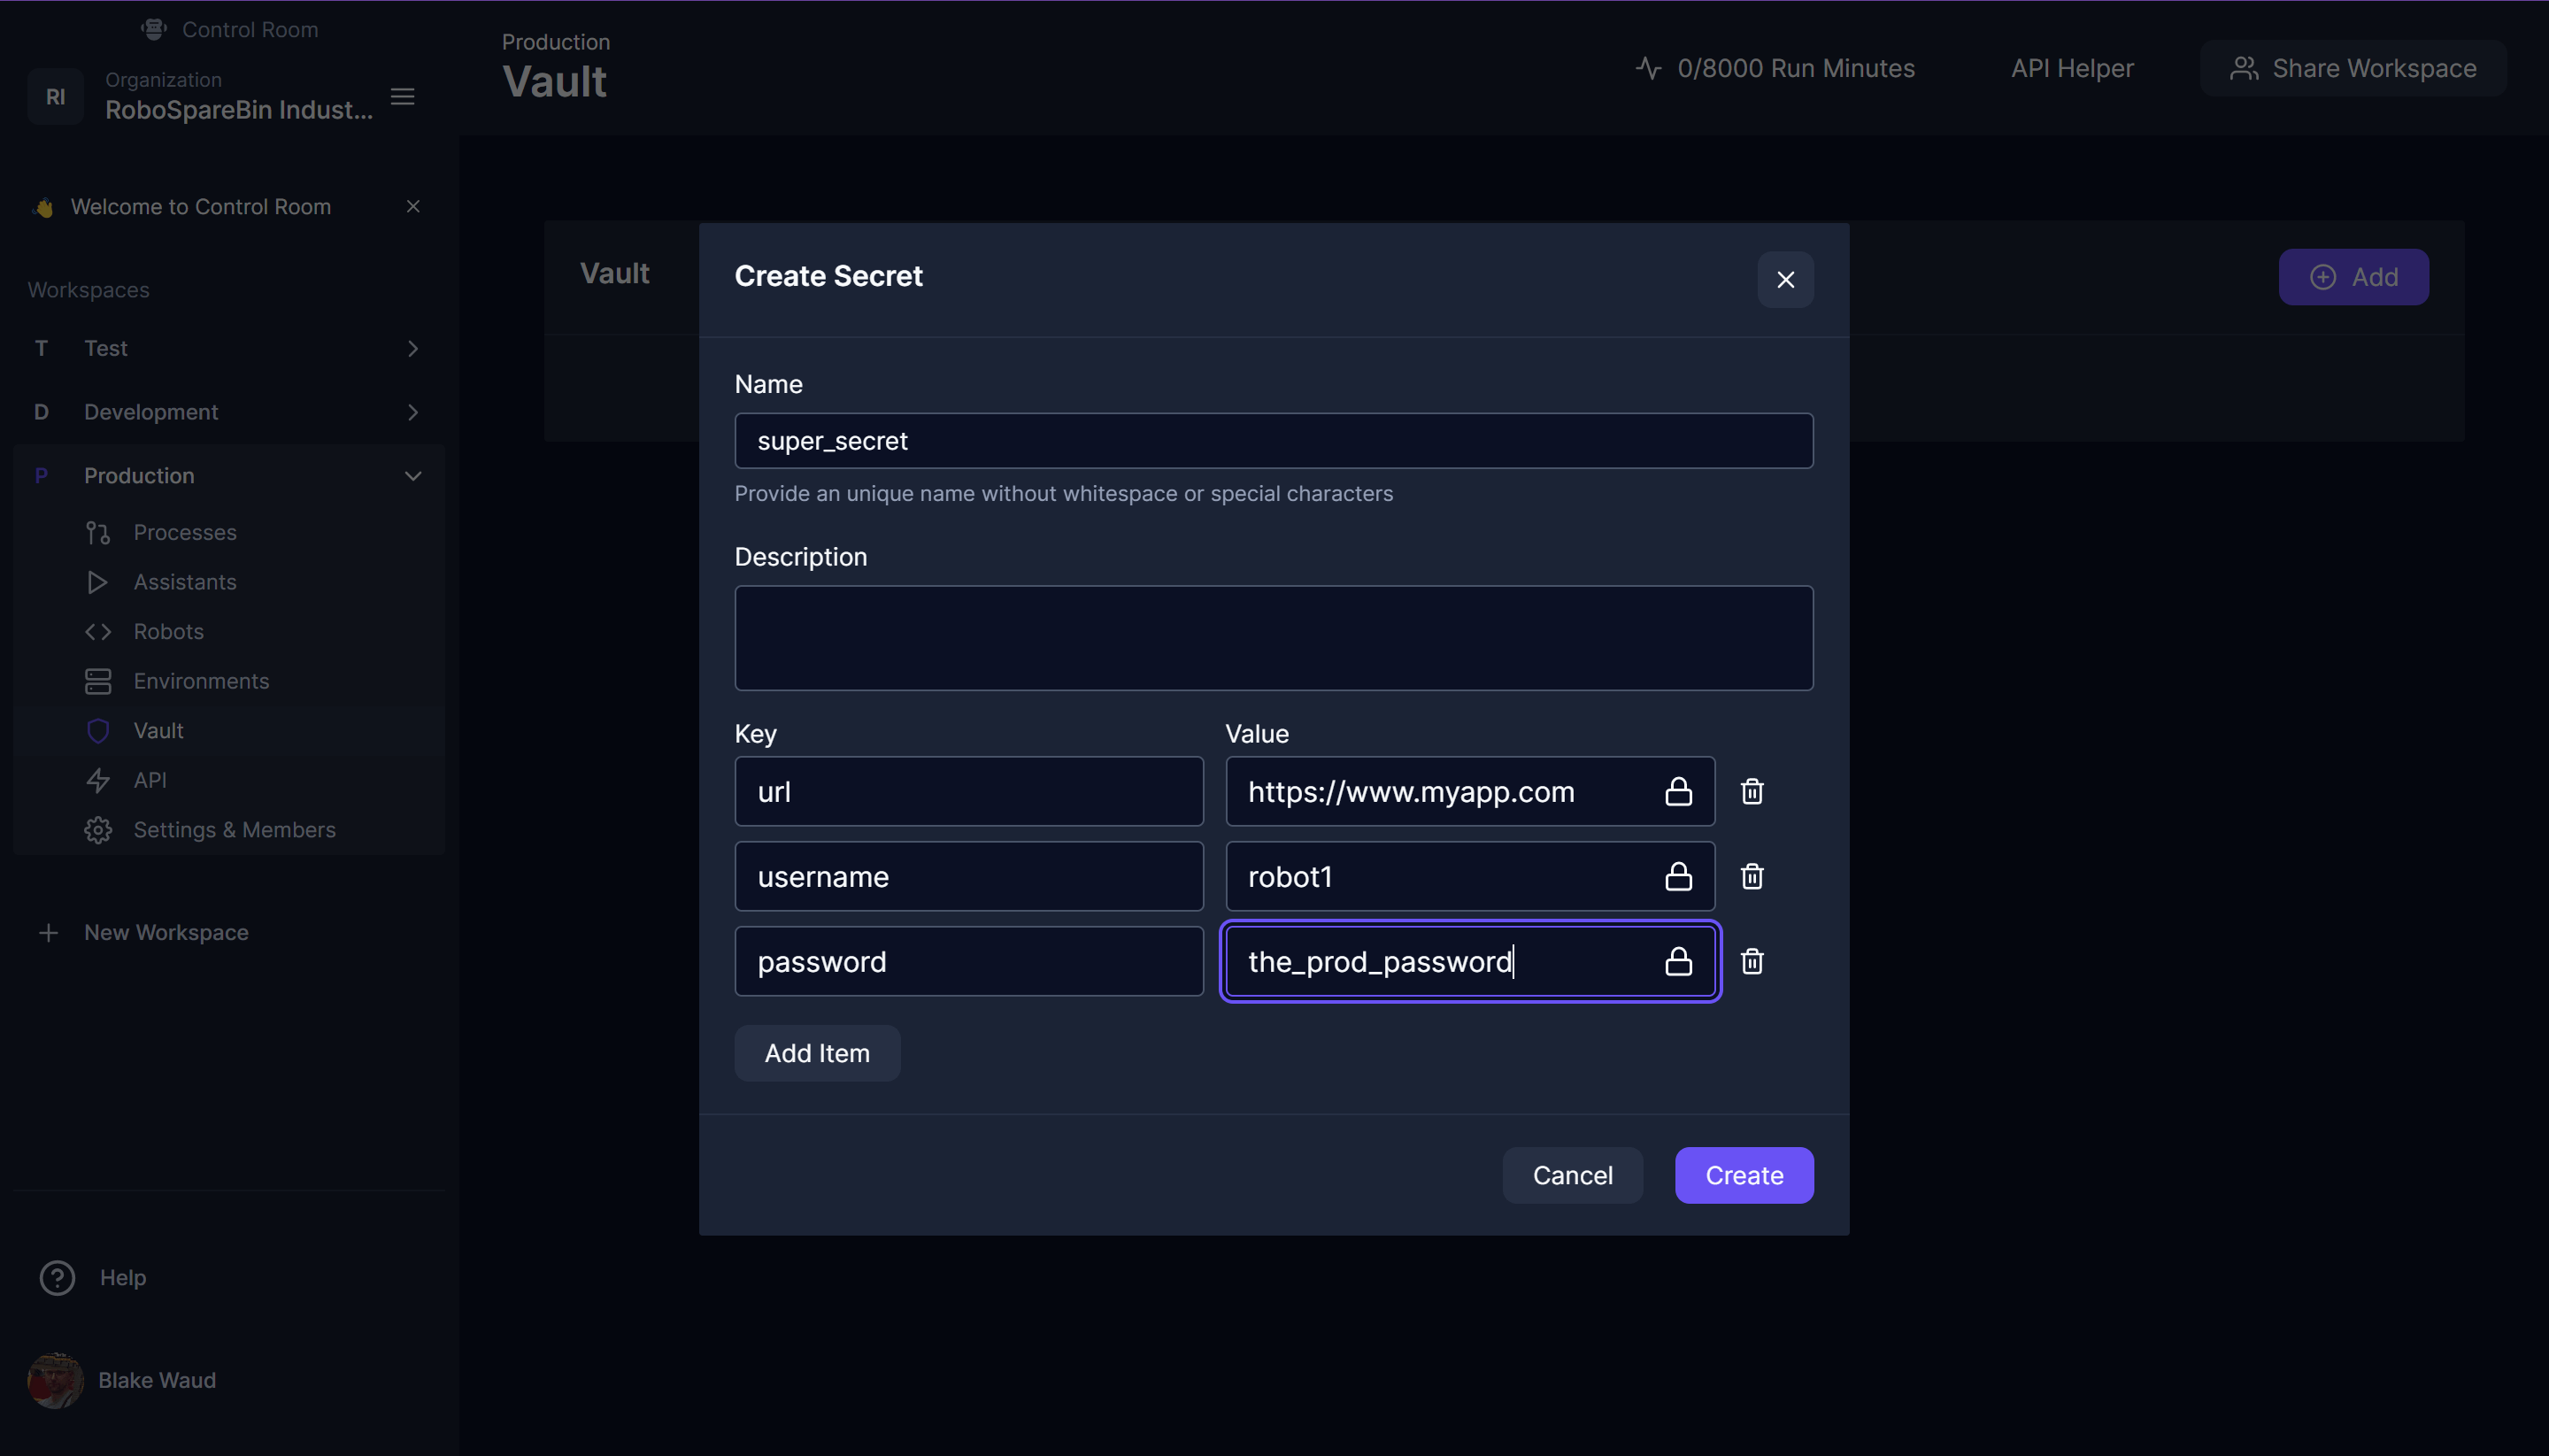
Finally, for most robots, they utilize some secrets to log into the applications they are automating. To make for a seamless experience, you will need to coordinate between the teams to choose vault object names and keys so they are all the same for each workspace, in our example, we do not use secrets in the template, but we can visualize this by creating a vault object called super_secret with the keys url, username and password. You would create this in each workspace and use different values, thus allowing the same robot with the same code to access different resources of your systems.
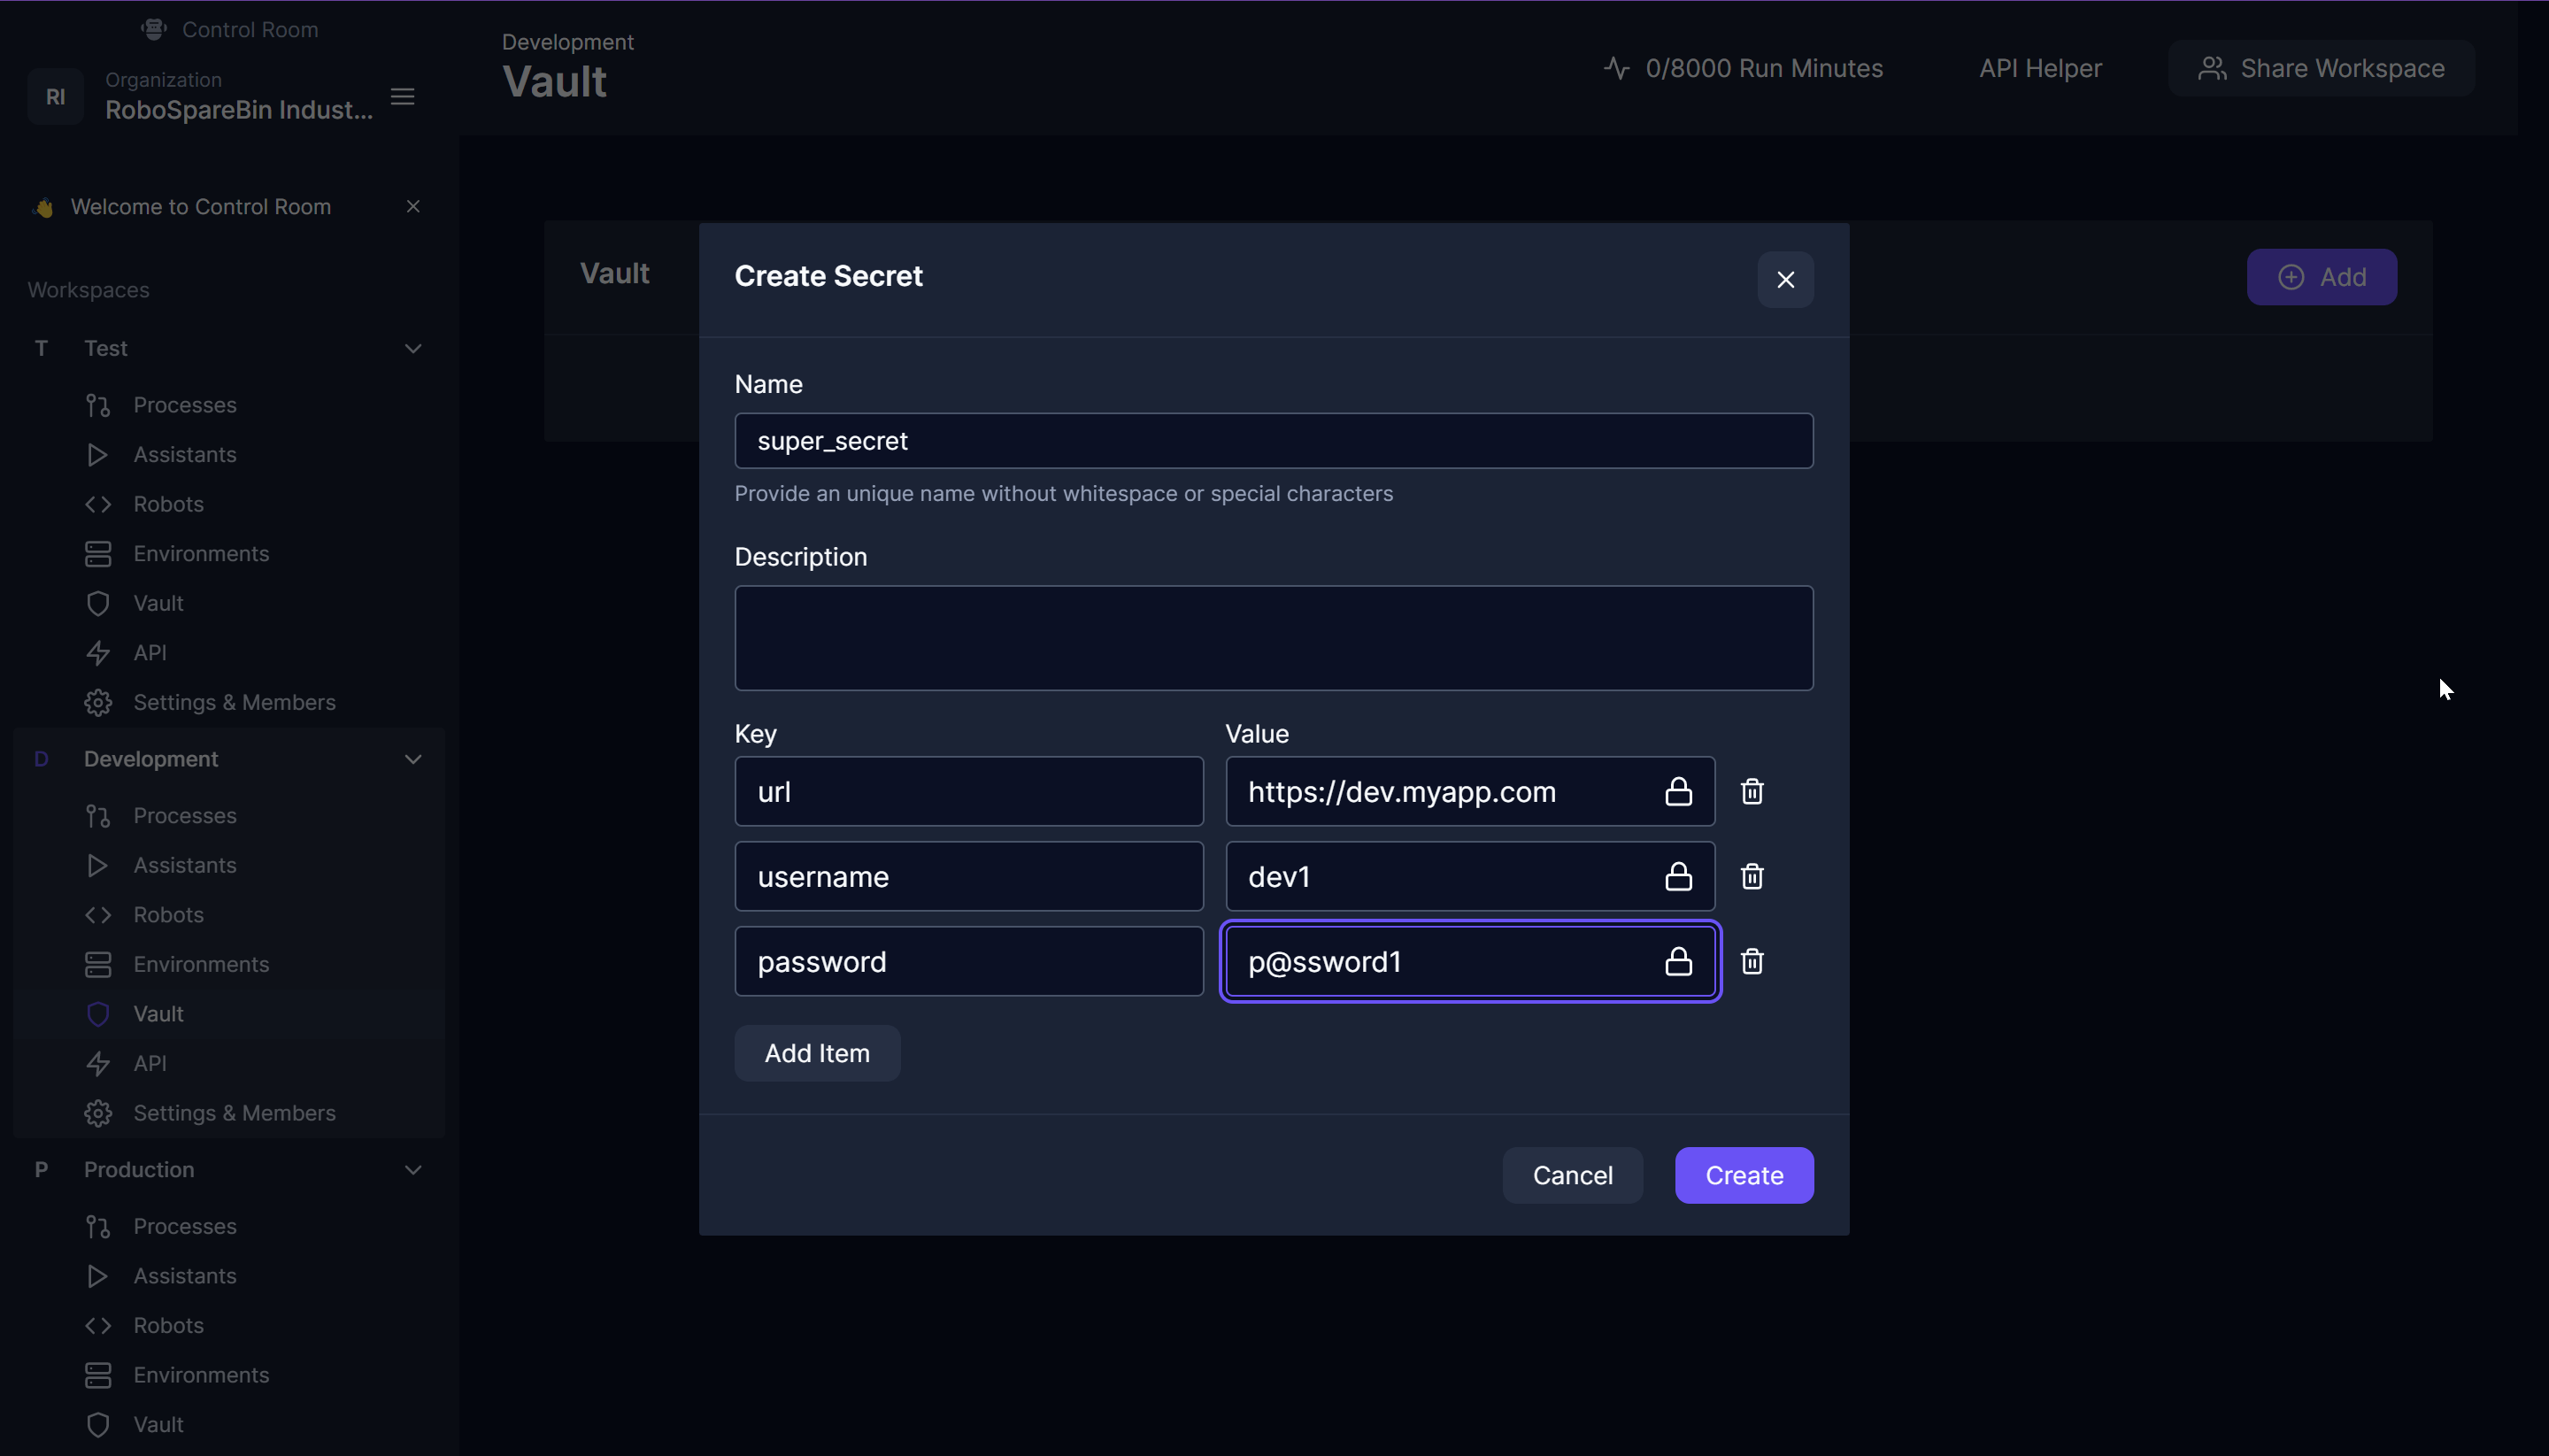
You may have other keys for these as well, but it is important to include the target URL in the vault so the robot can easily know how to go to the target app without having to set environment variables.
Of course, in a real scenario, you may also need to use specific runtimes which can reach your systems, as is often the case for test systems which are not accessible via the global internet.
Finally at this point, all you would need to do is configure the processes in each workspace identically, but that configuration is not included in this tutorial, check out our certification courses for additional tutorials!