GitHub actions integration
If you host your code on GitHub, you can take advantage of GitHub Actions and Control Room to set up any CI/CD workflow you need.
Robocorp provides and maintains GitHub Actions that are freely available and ready to use in your projects.
What are GitHub Actions?
GitHub Actions is a feature of GitHub that allows developers to set up various workflows that trigger based on specific events in GitHub repositories.
A common usage scenario is to run tests when a commit is pushed or a pull request is created (Continuous integration (CI)). Another is to push the code or its artifacts to another system, like a staging or production environment (Continuous Delivery (CD)).
GitHub actions are billed by usage, with a limited free plan available.
GitHub action: Update a robot in Control Room
Action: Robocorp - Upload robot to Control Room
Using this action, you can keep your robot code in sync between GitHub and Control Room. Instead of manually updating the code of your robot in Control Room when changes are made, you can automate the process by setting this action to trigger responding to the appropriate events for your needs and workflow.
Set up instructions
To set this action up, you will need to follow some setup steps, both on GitHub and Control Room.
As an example, we will create a workflow that will upload the robot to Control Room on each commit push on the main branch.
Control Room set up
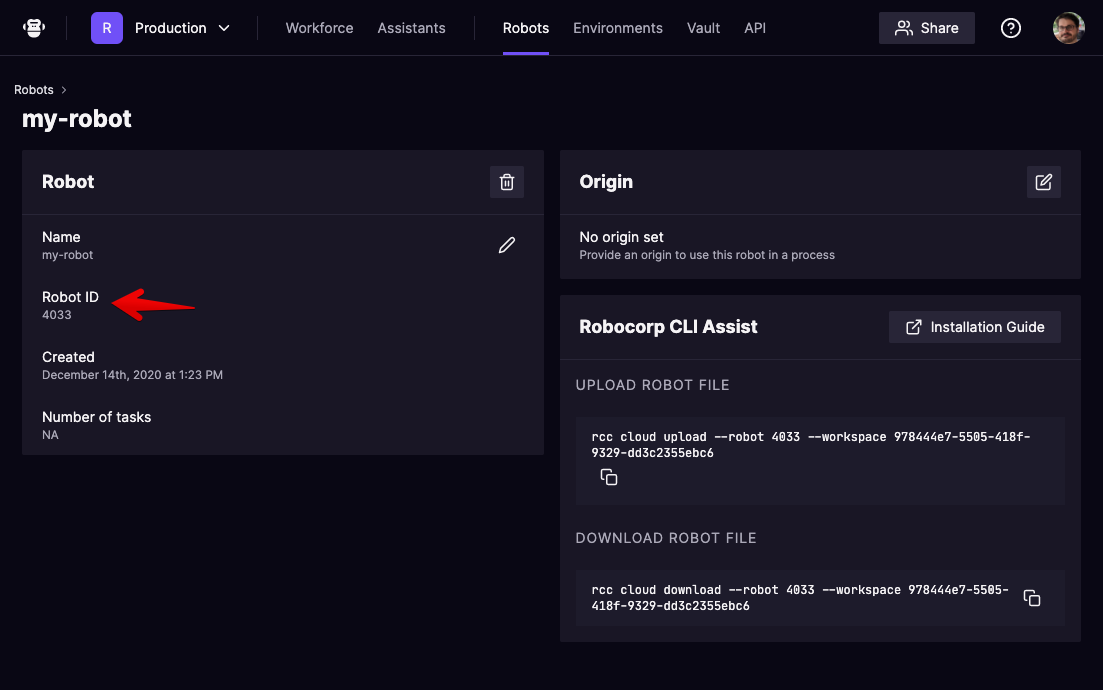
- If you haven't already, create a new robot in the appropriate workspace. Take note of the Robot ID property, that you can see on the robot detail page:
- Create an API key in your workspace, and make sure that it has at least the
write_robotspermission associated with it: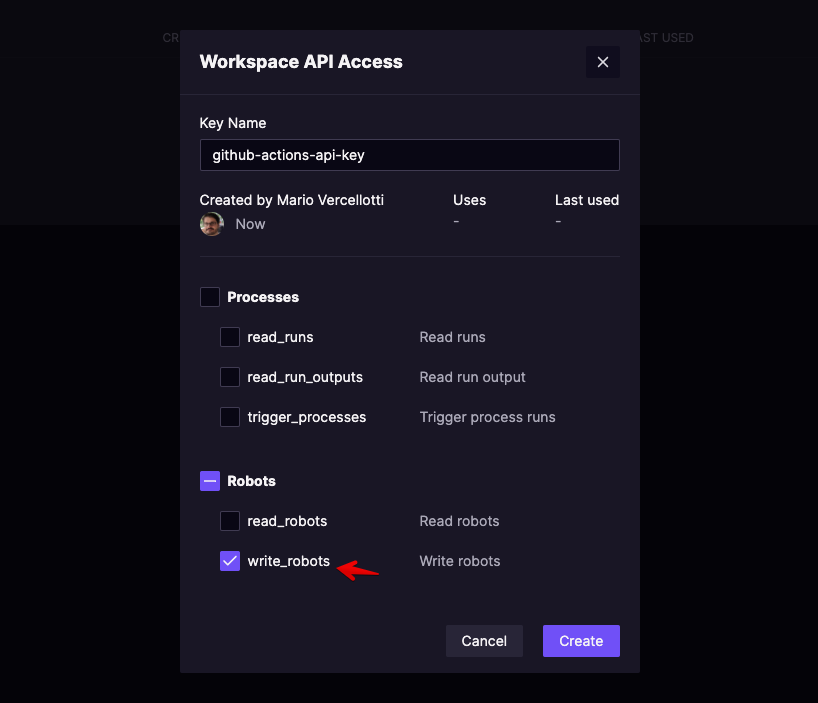
- Take note of the Workspace ID property of your workspace. You can find the value by visiting the detail page for the workspace in the
Organization settingssection for your organization: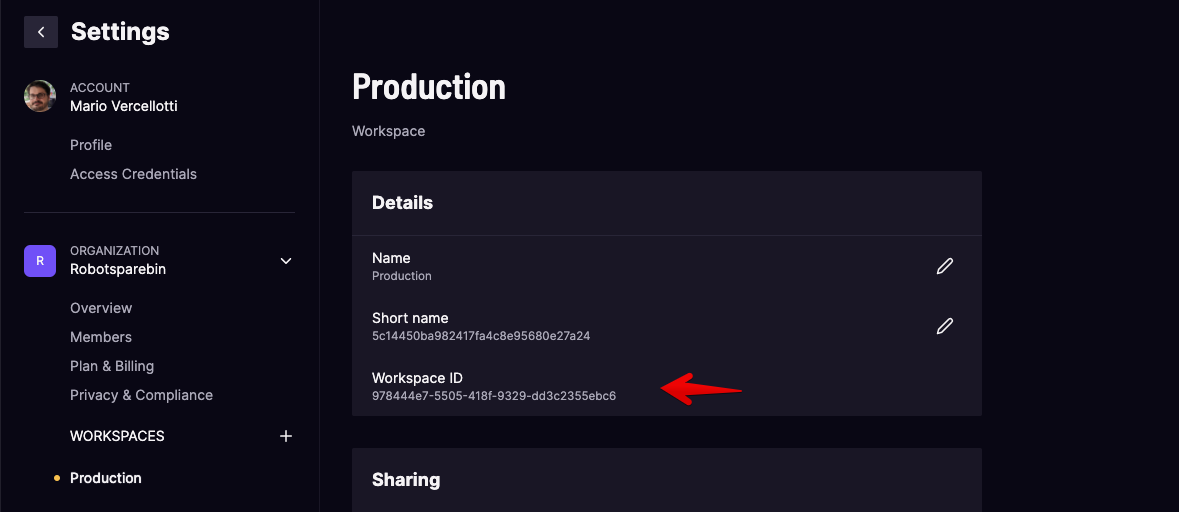
GitHub repository set up
This is a typical use case, but you can customize the workflow in various ways to match your needs. Check the GitHub actions documentation for more information.
-
Create a
.github/workflowsdirectory in your GitHub repository, and add into it a new file for your workflow with the.ymlextension. You can choose the name for the file, for example,trigger-robocorp-control-room.yml. -
Add this content to the file and push it to the repository's main branch:
-
As you can see, we are not hardcoding the needed access information in the file, but we are using the Secrets feature provided by GitHub.
Access the
Settingstab of your repository, and select theSecretssection. Click on theNew repository secretbutton, and add the three secrets:ROBOCORP_WORKSPACE_KEY, with the value of the API key you created in Control Room.ROBOCORP_WORKSPACE_ID, with the ID of the workspace that contains the robot.ROBOCORP_ROBOT_ID, with the ID of the robot in the workspace in Control Room.
-
Push any change to your repository's
mainbranch, and the code will be checked out and pushed to your robot in Control Room.
GitHub action: Trigger a process run in Control Room
Action: Trigger Control Room process run
Using this action, you can trigger any process in Control Room. A typical use case for this action is in test automation. You can have a process set up in Control Room that performs tests on the application or website that you are developing and then run the tests when various triggers happen in your repository, like when new code is merged into a branch, or a pull request is opened, etc.
You can also combine the two GitHub actions into a workflow that updates the robot in Control Room and then runs it once if that fits your needs. You can also add any other available GitHub action to create the best fitting workflow for your use case.
Set up instructions
To set this action up, you will need to follow some setup steps, both on GitHub and Control Room.
As an example, we will create a workflow that will trigger the specified robot in Control Room on each pull request that is opened for the main branch of the repository.
Control Room set up
- Choose an existing process or set up a new one. Get the
process IDfor your process from the URL of the page in Control Room.The process ID will be the last part of the URL. For example in the URL
https://cloud.robocorp.com/xxx/xxx/processes/ae9cce11-c967-4add-879d-2ed0902eeb27, the process ID will beae9cce11-c967-4add-879d-2ed0902eeb27. - Create an API key in your workspace, and make sure that it has at least the
trigger_processespermission associated with it: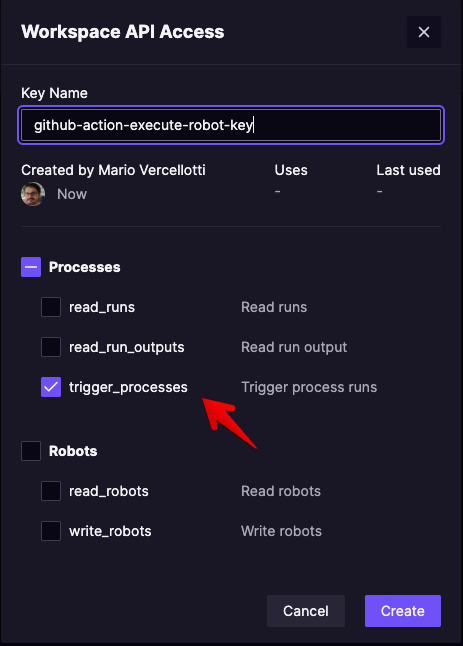
- Take note of the
Workspace IDproperty of your workspace. You can find the value by visiting the detail page for the workspace in theOrganization settingssection for your organization:
GitHub repository set up
-
Create a
.github/workflowsdirectory in your GitHub repository, and add a new file for your workflow with the.ymlextension in it. You can choose the name for the file, for example,trigger-robocorp-control-room.yml. -
Add this content to the file and push it to the repository's main branch:
Note that you can pass work item information using the
payloadkey.
Using the
await-completekey, you can determine whether the action should wait for robot completion before continuing or not.
See all available options on the Action's homepage on the GitHub marketplace.
- As you can see, we are not hardcoding the needed access information in the file, but we are using the Secrets feature provided by GitHub.
Access the Settings tab of your repository, and select the Secrets section. Click on the New repository secret button, and add the three secrets:
ROBOCORP_WORKSPACE_KEYwith the value of the API key you created in Control Room.ROBOCORP_WORKSPACE_IDwith the ID of the workspace that contains the robot.ROBOCORP_PROCESS_IDwith the ID of the process in the workspace in Control Room.
- Create a pull request to the
mainbranch, and the robot will be triggered.
Learn more
Check out the official guide to GitHub actions for a lot more information, guides, and tutorials.