Getting to the intranet
Ok, let's teach our robot something useful!
Defining our task
Our robot will not be spending its precious time writing "Done." in the log; it has a job to do. Let's start by being ambitious and describe the full job it will need to do in one phrase. That will become our task description.
We settle on: Insert the sales data for the week and export it as a PDF
Let's update the high-level documentation of our robot. When someone reads the high-level documentation, they should get a basic understanding of what this robot is about. In the tasks.robot file, edit the *** Settings *** section like this:
You can click the clipboard icon on the top-right corner of the code blocks on these pages to copy the whole block of code. Then you can paste the code into your editor. Typing is also ok!
We can use the same description for the task name. Edit the task name in the *** Tasks *** section like this:
You can save your edits by pressing Command-S (macOS) or Ctrl+S (Windows).
One useful thing to enable is automatic code formatting when you save your edits.

- From the top menu in VS Code, navigate to
Code->Preferences->Settings(macOS) orFile->Preferences->Settings(Windows). - In the search field at the top, type
format on save. - Select (check) the
Editor: Format On Savesetting. - Press
Command-W(macOS) orCtrl+W(Windows) to close the settings view.
Now, whenever you save, your code will be automatically formatted. The formatter will do its best to add a consistent amount of spaces for indentation (more about indentation later), etc. Cool!
The first step: opening the intranet
Just like Maria does when she starts working with the sales data, the robot will need to open a browser and navigate to the intranet website.
Great! Let's add it to our task as the first step. We can use natural language to describe the step (emojis are supported, too! 😀). We choose to name our step Open the intranet website. In the *** Tasks *** section, under the name of our task, we add our first step using human-readable language:
The meaning of Open the intranet website is clear enough for us humans, but the robot does not yet know what that means or what it is supposed to do. How do we explain that to it? We add a new keyword, where we tell the robot what Open the intranet website does in practice.
Note that our step (keyword call),
Open the intranet website, is indented with four spaces (having four spaces before theOpen the intranet websitekeyword). We'll explain this in more detail shortly!
Also, the editor will underlineOpen the intranet websitewith red, complaining aboutUndefined keywordsince we have not defined the keyword yet.
Adding a new keyword
Add a new *** Keywords *** section heading and the name of our keyword after the *** Tasks *** section. The robot knows that everything under the *** Keywords *** section heading is a keyword that it can call:
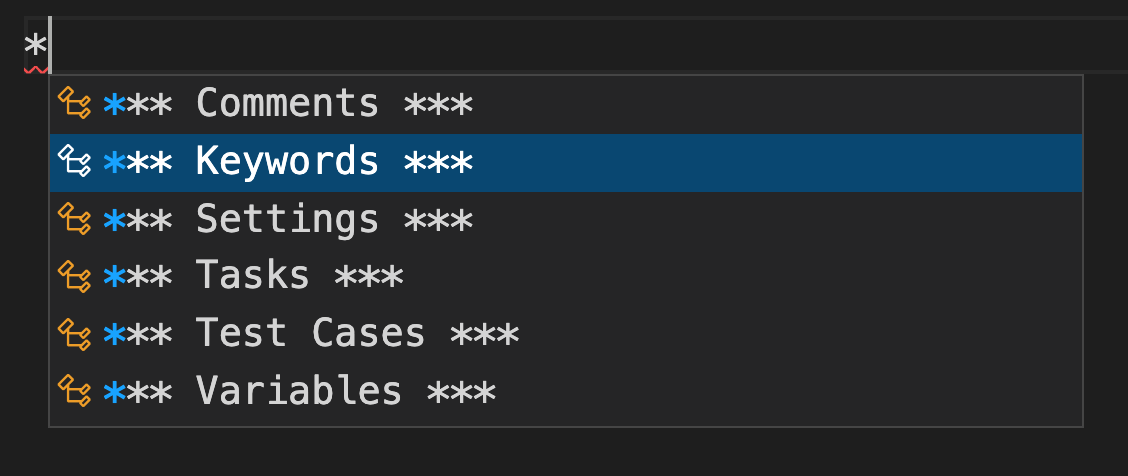
Try out the code auto-completion: Type the first (or a few) characters (
*or***) of the section header name and then pressControl-Space(macOS) orCtrl+Space(Windows). A code auto-completion popup, well, pops up, suggesting some possible completions. Select the*** Keywords ***completion.
Meet the lazy programmers best friend! You will be bashing the auto-complete shortcut all day long! Note that lazy has a positive meaning here. Such a developer tries to find the simplest solutions and save time building those. 😀
The full robot file should look similar to this (one *** Settings *** section, one *** Tasks *** section, and one *** Keywords *** section):
You can place the
*** Tasks ***section before or after the*** Keywords ***section. Here we place the tasks before the keywords so that it's quick to view the general flow of the robot's task(s).
Great! Now, Open the intranet website has become the name of a keyword. It does not do anything yet (it's just a name - you can think of it as a name of a function or method). How can we teach our robot to open a browser and work with it? 🤔
Adding our first library
The answer is by adding a library. Libraries teach our robots new skills by making new keywords available to them. In our case, we want to work with the browser, so we will add the RPA.Browser.Selenium library. Libraries are added in the *** Settings *** section of robot scripts.
Finding libraries and keywords using the interactive console panel
How do we know what library to add and what keywords are available to us? No worries - our tools will assist us!
Opening the interactive console panel
In the editor, at the top of our newly added keyword name, Open the intranet website, is a link: Load in Interactive Console. Let's click that!
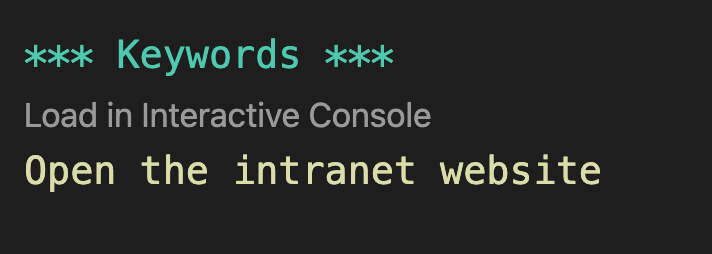
A Robot Framework Interactive Console panel opens on the right side of VS Code screen. This tool will help you find and test keywords and libraries!

You can ignore the help texts and the error at the bottom of the interactive console panel. The error is there because our current keyword is still incomplete and does not contain any content (it has just the name).
Making more space for your screen
If your screen feels a bit crowded with all the panels open, you can try these useful keyboard shortcuts:
- Toggle (hide/show) the left panel:
Command-B(macOS) orCtrl+B(Windows) - Toggle (hide/show) the bottom panel:
Command-J(macOS) orCtrl+J(Windows) - Zoom out:
Commandand-(macOS) orCtrland-(Windows) - Zoom in:
Commandand+(macOS) orCtrland+(Windows)
The interactive console prompt
At the bottom section of the interactive console panel, you see a box with two arrowheads (>>) and a blinking cursor. This is the interactive console prompt. You will type in it soon!
We want to open any available browser on our system. We don't care what exact browser to use - any available browser will do the job!
Type open in the prompt with the blinking cursor. A list of keywords appears (hello, auto-completion!). In the list, there are keyword names followed by the library that provides those keywords (in the parentheses).
You can manually display the suggestion list by pressing
Control-Space(macOS) orCtrl+Space(Windows).
We are interested in the Open Available Browser (RPA.Browser.Selenium)* one. Select that entry from the list using arrow keys on your keyboard and then pressing Enter.

The
*after a library name indicates that VS Code will automatically generate the library import line for you if that library has not been already imported.
At the top of the console prompt, a piece of code appears magically:
That piece of code is the interactive console helping us out by providing the syntax we need to import the RPA.Browser.Selenium library into our robot. Since we already have the *** Settings *** section defined in our robot, we can copy and paste just the library import syntax:
Copying and pasting text from the interactive console
To copy text from the interactive console panel, select the Library RPA.Browser.Selenium text by selecting it with your mouse (click & drag to select the text). Press Command-C (macOS) or Ctrl+C (Windows) to copy the text.
To insert the copied text to your robot file in the editor, add a new line under the Documentation line in the *** Settings *** section and press Command-V (macOS) or Ctrl+V (Windows) to paste the selected text in. Save your edits (Command-S on macOS, Ctrl+S on Windows).
Copy & paste shortcuts are also our friends. Learn them. Embrace them.
After that copy and paste operation, the *** Settings *** section should look like this:
Congratulations! You found and imported your first library. Now the robot can use all of the keywords provided by that library. 😀
RPA.Browser.Seleniumis part of the RPA Framework set of open-source automation libraries. Contributions welcome!
Using keywords from a library
To open a browser and navigate to the intranet, we can now use the Open Available Browser keyword provided by the RPA.Browser.Selenium library, and give it the address (URL) of the intranet as an argument.
Executing a keyword in the interactive console
Let's go back to the interactive console panel. You can see the Open Available Browser keyword name in the console prompt.
Click somewhere in the prompt to select it so that you see a blinking cursor. Try hitting Enter. The Open Available Browser keyword is now executed, and a real web browser should open. Hurray!
Your operating system might ask permission to do things at this point. Grant those permissions! 🙂
You can close the browser window for now.
You execute (run) keywords in the interactive console by calling them using their name. You can also pass arguments to those keywords. More about that soon!
Viewing keyword documentation in the interactive console
Again, type open in the interactive console prompt to view the keyword suggestions. Select the Open Available Browser from the list with your keyboard arrow keys, but this time instead of pressing Enter, press Control-Space (macOS) or Ctrl+Space (Windows). The keyword documentation should pop open. It looks something like this:
Open Available Browser(url: str | None = None, use_profile: bool = False, headless: Any = AUTO, maximized: bool = False, browser_selection: Any = AUTO, alias: str | None = None, profile_name: str | None = None, profile_path: str | None = None, preferences: dict | None = None, proxy: str | None = None, user_agent: str | None = None, download: Any = AUTO)
Attempts to open a browser on the user's device from a set of supported browsers. Automatically downloads a corresponding webdriver if none is already installed.
Further down in the keyword documentation, there are longer descriptions and keyword usage examples. However, let's take a quick look at the documentation at the very top of the documentation popup:
The Open Available Browser is the name of the keyword. Everything after that is related to what arguments that keyword takes. The name of the first argument here is url. There's some additional information: The url is a string (str). | None = None means it is optional (you don't have to give a URL argument at all if you want to open an empty page). Other arguments are use_profile, headless, maximized, and so on. We don't need to worry about those in this course, but it is good to know they are available when you need them!
Executing a keyword with an argument in the interactive console
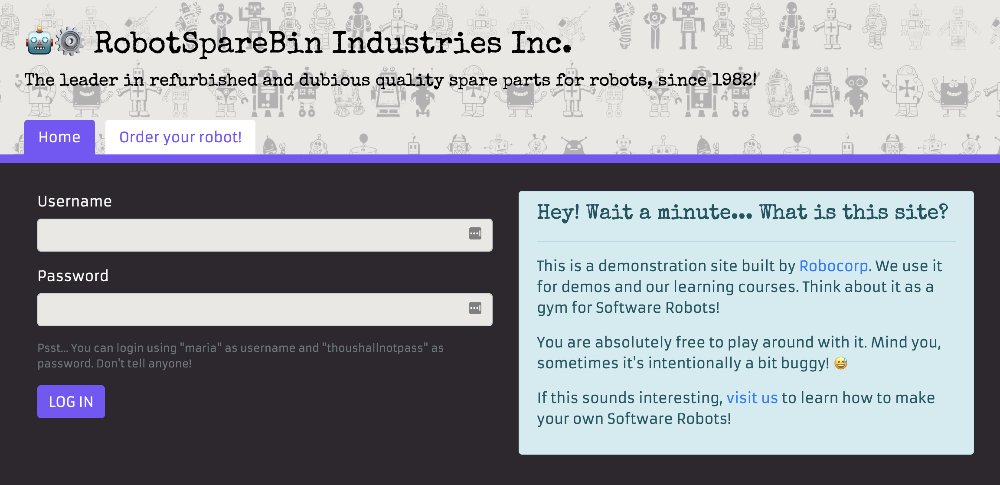
We learned from Maria that the intranet is located at https://robotsparebinindustries.com/. Instead of opening an empty page in the browser, we can go directly to the given address (URL).
Let's try this in the interactive console!
Press Enter to close the keyword documentation popup. The interactive console prompt should display Open Available Browser and a blinking cursor.
Press TAB on your keyboard to add four spaces after the Open Available Browser keyword name. Paste or type in the https://robotsparebinindustries.com/ URL. The prompt should contain something like this:
Press Enter to execute the Open Available Browser keyword with https://robotsparebinindustries.com/ as the URL argument. The robot should open the intranet page in the browser. Woohoo! You can leave the browser open this time!
You can resize and position your VS Code and the browser windows so that you can see both simultaneously or switch between the windows. Whatever works for you!
Copying code from the interactive console to the code editor
Now that you know the exact keyword call, copy and paste it to your robot file:
You can copy & paste this code from the interactive console or start typing it in the editor. The code auto-completion will suggest you a matching keyword! You can also manually trigger the auto-completion by pressing
Control-Space(macOS) orCtrl+Space(Windows). Both the editor and the interactive console can be used for coding your robot.
Note: You need to have at least two spaces before the
Open Available Browserkeyword call. This is called indentation. The default is to use four spaces (trivia: the same is true in Python). You can indent by pressing theTABkey on your keyboard (orSpace, if you prefer that). The spaces are visualized here as underscores:____Open Available BrowserAlso, you need to have at least two spaces between the keyword and its arguments to separate them. If you only have one space, the argument is considered as part of the keyword name. The spaces are visualized here as underscores:
Open Available Browser____https://robotsparebinindustries.com/
Fantastic libraries and where to find them ⚡️
We have ambitious plans for our robot, and along the way, we will add more libraries to make it smarter and allow it to do more things. We learned that the interactive console could help us find keywords and libraries. But how do we know which libraries are available and how they work?
The best place to start is the Libraries page, where we have compiled a list of useful libraries for Robotic Process Automation. Take the RPA.Browser.Selenium library that we just added, for example. It has its own documentation page where you can see examples on how to use it, and the list of all the keywords it provides.
You are not limited to the libraries listed on our site. You can find other libraries around the web. Read about adding packages to your robot to learn how to define the packages you want to use in the conda.yaml configuration file.
When you are more familiar with coding, you can also create your own libraries. It's surprisingly easy!
Ok, now back to our robot!
The robot so far
Now our robot looks like this:
Let's run our robot and enjoy the robot starting to work for us:
- Open the Command Palette by pressing
Shift-Command-P(macOS) orCtrl+Shift+P(Windows). - (Optional): Type
run robot. This will find the command you need. - Press
Enterto run theRobocorp: Run Robotcommand.
You should see the robot opening a web browser and navigating to the given URL. The output in the terminal should look similar to this:
Keeping the browser open after task completion
You may have noticed that the robot opened the web browser, navigated to the given URL, and then immediately closed the browser.
This automatic closing of the browser is the default behavior of the RPA.Browser.Selenium library. The reason is to keep the robot from leaving unnecessary browser processes running after it's done. This is important in production use!
However, when developing a robot, it is usually useful to have the browser stay open so that you can continue automating the next parts of the process. The interactive console is a great way to implement your robot in small steps and keep the browser open.
When running your robot from the Command Palette, if you want to keep your browser open after the task has been completed, you can modify your library import like this (adding the auto_close=${FALSE} argument):
Note that your robot will not be able to further "talk to" a browser that is left open this way (using the
auto_closeargument). Use the browser only for your reference during development. When a browser is opened from the interactive console, you can continue talking to that browser from the interactive console.
Let's use this "do not close the browser" trick during this course so that you will remember it exists. Go ahead and update your library import using the above code!
Each new robot run will open a new browser so remember to close them from time to time to avoid drowning in Chromes, Firefoxes, or Safaris. 😅
What we learned
- Try to define the task of your robot in one concise phrase.
- You can define your own keywords and call them in your task.
- Your own keywords can call other keywords. Keywordception!
- Tasks should be placed under the
*** Tasks ***section. - Keywords should be placed under the
*** Keywords ***section. - You can get new keywords for your robot by adding libraries.
- The
conda.yamlconfiguration file defines the packages you want to use. For example, by default, therpaframeworkpackage is already defined in theconda.yamlfile. If you want to add more packages, you add them in theconda.yamlfile. - Libraries add new capabilities to your robot.
- Libraries are added in the
*** Settings ***section of your.robotfile. - You can use the interactive console to find libraries and keywords.
- You can load and run keywords directly in the interactive console. This is a great way to try them out! Load the keyword in interactive console. Run it by calling it by its name. Edit the keyword. Load the keyword in interactive console. Rerun by calling it by its name. Iterate! 💪
- You can view keyword documentation in the editor or the interactive console using keyboard shortcuts.
- You can copy & paste keyword calls from the interactive editor to the editor or write them directly in the editor.
- Testing your robots often, even after each edit, gives you continuous feedback on how your robot functions.
- You can open a browser with the
Open Available Browserkeyword by giving it the URL you want to open as an argument. - Indentation is important.
- You have to separate arguments and keywords with at least two spaces.
- Automatic code formatting is available in VS Code settings.
- Auto-completion and documentation can be toggled with
Control-Space(macOS) orCtrl+Space(Windows).